If you have already installed Oracle VirtualBox and the Linux operating system, you can proceed with the Install Oracle 19c software part. If you do not have a virtual Box to Install Oracle 19c software, follow the article How to Install and setup Oracle Virtual Box.
Table of Contents
Please proceed with the below steps to install Oracle 19c software in your machine/server/VirtualBox:
1. Login to your machine/server/VirtualBox (Here machine1) as root and open terminal. Check ifconfig and note down the IP address.
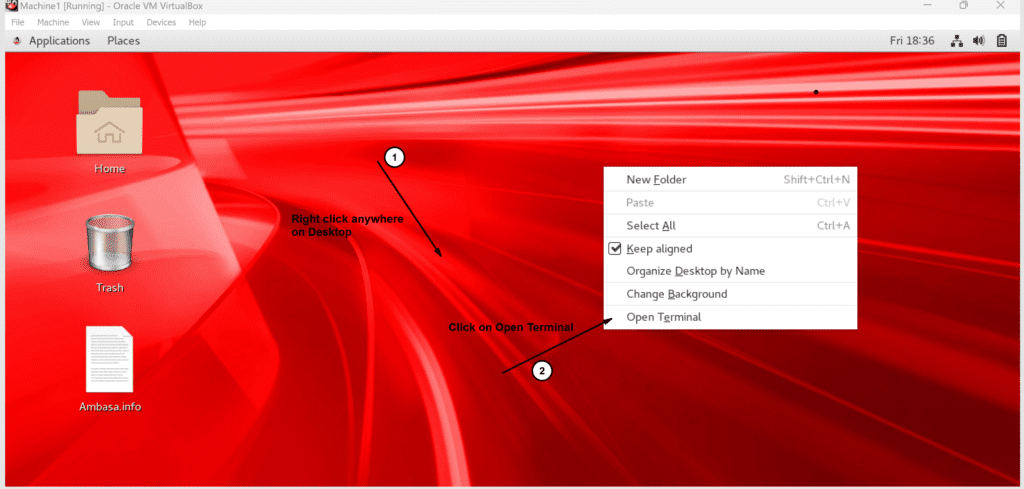

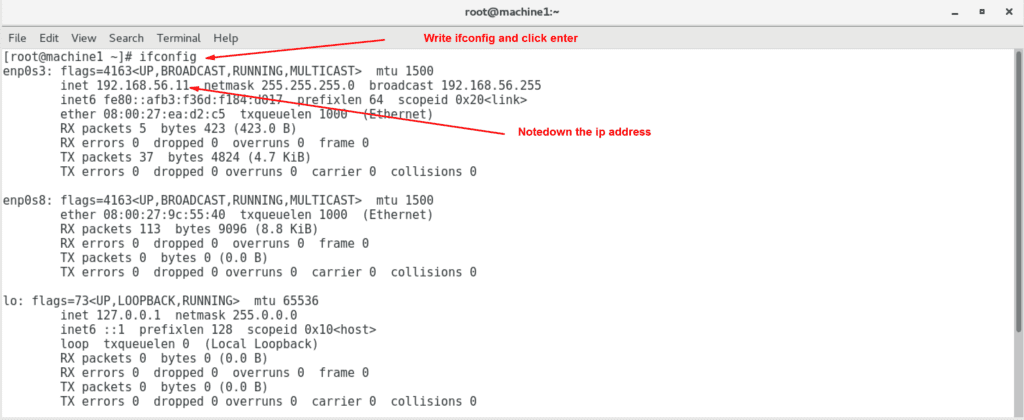

2. Now log in as a root user in Putty/MobaXterm with the following details:
IP - 192.168.56.11 (Received from 1st step)
username - root
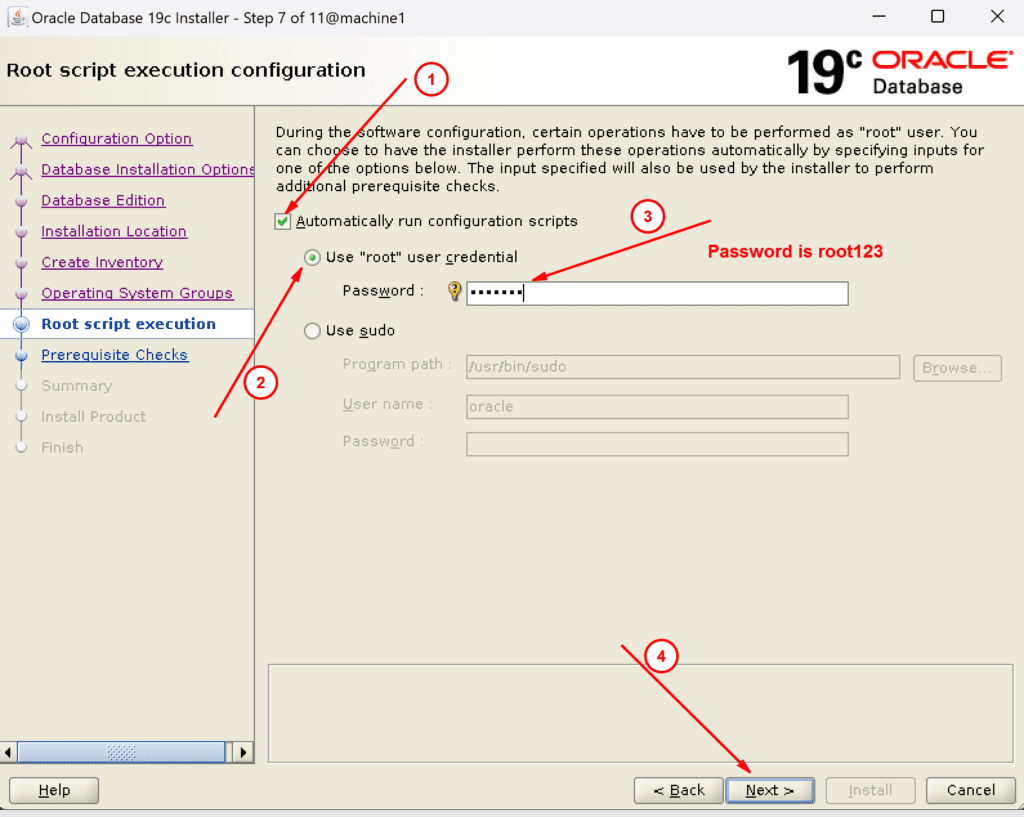
Password - root123
If you do not know how to log in/set up PUTTY/MobaXterm, please follow the articles Putty install/setup MobaXterm Install/setup.
3. Oracle software installation prerequisites steps:
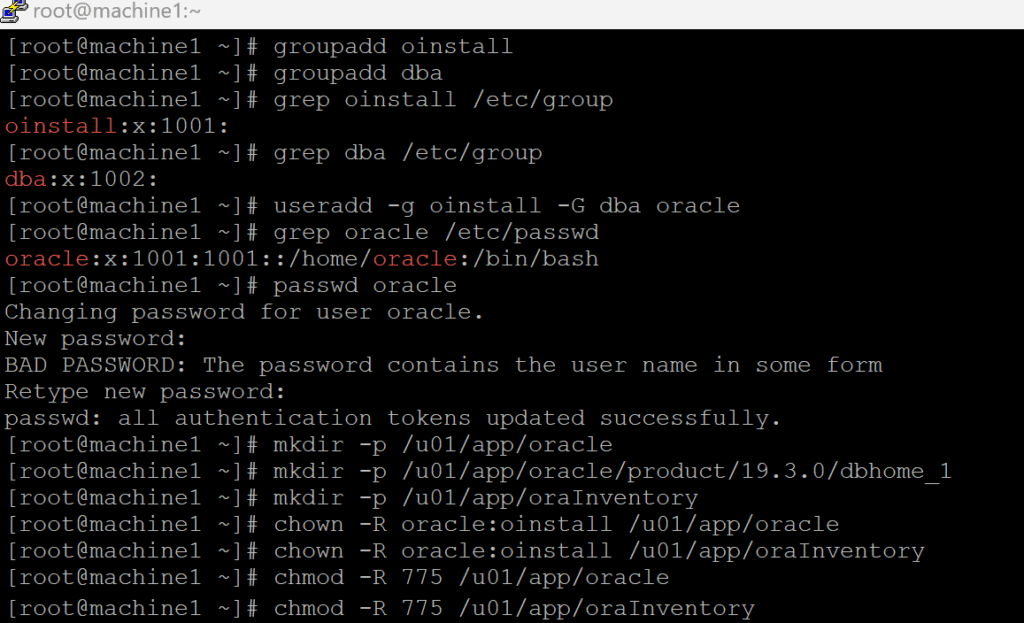
a.Create Two Groups oinstall & dba as root user in machine1 and verify:
[root@machine1 ~]# groupadd oinstall
[root@machine1 ~]# groupadd dba

[root@machine1 ~]# grep oinstall /etc/group
oinstall:x:1001:
[root@machine1 ~]# grep dba /etc/group
dba:x:1002:
b.Create Oracle User and add to the groups oinstall & dba:
[root@machine1 ~]# useradd -g oinstall -G dba oracle
[root@machine1 ~]# grep oracle /etc/passwd
oracle:x:1001:1001::/home/oracle:/bin/bash
c.Change the password of the Oracle user:
[root@machine1 ~]# passwd oracle
Changing password for user Oracle.
New password:
BAD PASSWORD: The password contains the user name in some form
Retype new password:
passwd: all authentication tokens updated successfully.
d. Create three directories:
[root@machine1 ~]# mkdir -p /u01/app/oracle                                #ORACLE_BASE
[root@machine1 ~]# mkdir -p /u01/app/oracle/product/19.3.0/dbhome_1        #ORACLE_HOME
[root@machine1 ~]# mkdir -p /u01/app/oraInventory                          #Central Inventory
e.change the ownership and permissions:
[root@machine1 ~]# chown -R oracle:oinstall /u01/app/oracle
[root@machine1 ~]# chown -R oracle:oinstall /u01/app/oraInventory
[root@machine1 ~]# chmod -R 775 /u01/app/oracle
[root@machine1 ~]# chmod -R 775 /u01/app/oraInventory

f. Use the below “oracle-database-preinstall-19c” package to perform all your prerequisite setup by issuing the following command:
yum install -y oracle-database-preinstall-19c
It is probably worth doing a full update, but this is not strictly necessary. If your virtual machine is not connected to the Internet, you must manually download and install the required packages.
Verify that the preceding command automatically updates the Kernel parameters:
cat /etc/sysctl.d/99-oracle-database-preinstall-19c-sysctl.conf
Verify that the resource limits are automatically configured for Oracle users:
cat /etc/security/limits.d/oracle-database-preinstall-19c.conf
4. Open Mobaxterm and log in as an Oracle user:
IP - 192.168.56.11
username - oracle
password - oracle123
5. Unzip the Oracle home Software as an Oracle user and run the runInstaller to install Oracle software:
unzip /softwares/19.3.0.0.0/LINUX.X64_193000_db_home.zip -d /u01/app/oracle/product/19.3.0/dbhome_1

cd /u01/app/oracle/product/19.3.0/dbhome_1
./runInstaller


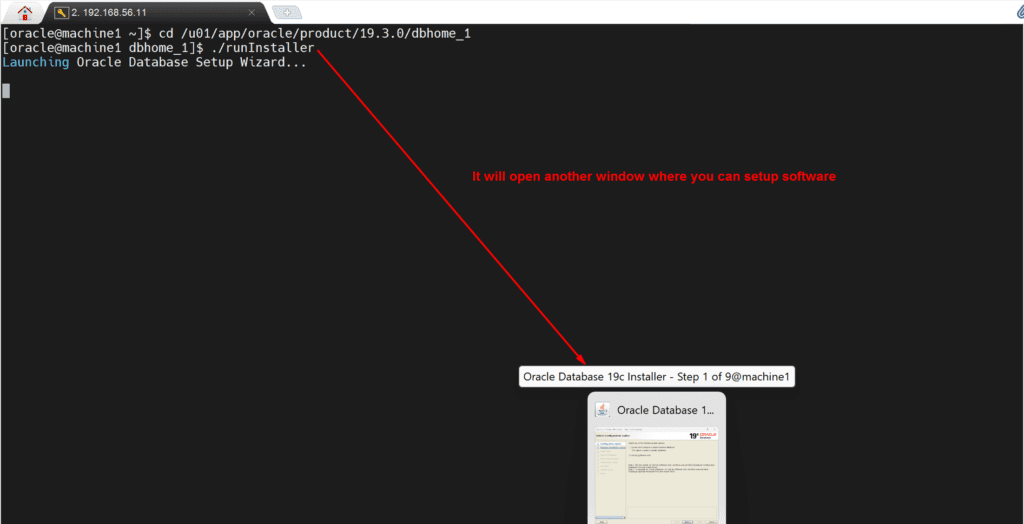

NOW FOLLOW THE BELOW INSTRUCTIONS GIVEN IN EACH SCREENSHOT:
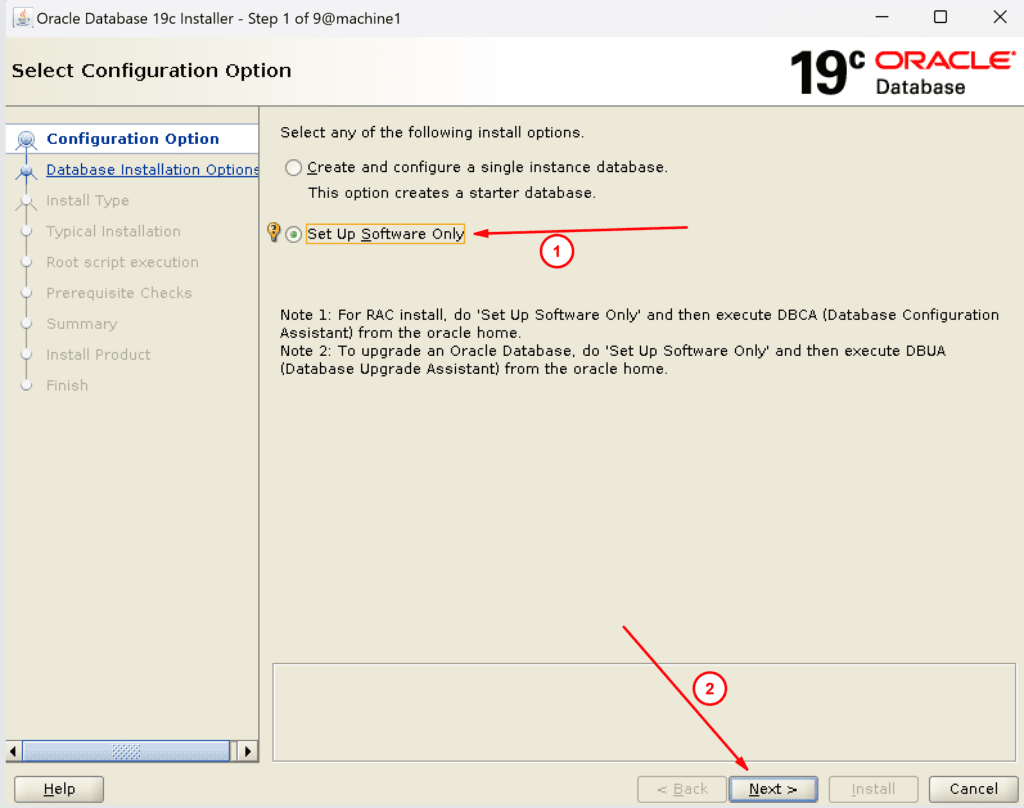
6. Click on Set up software only to install the Oracle software and click on Next:

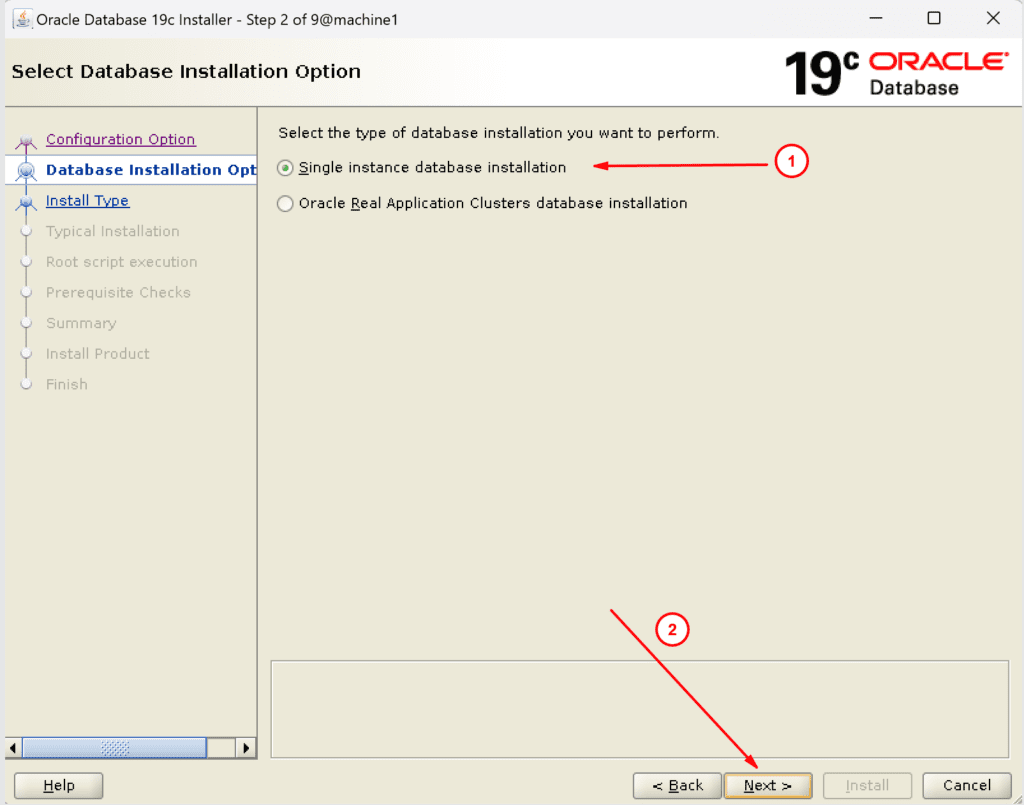
7. Click on single instance database installation and click next:

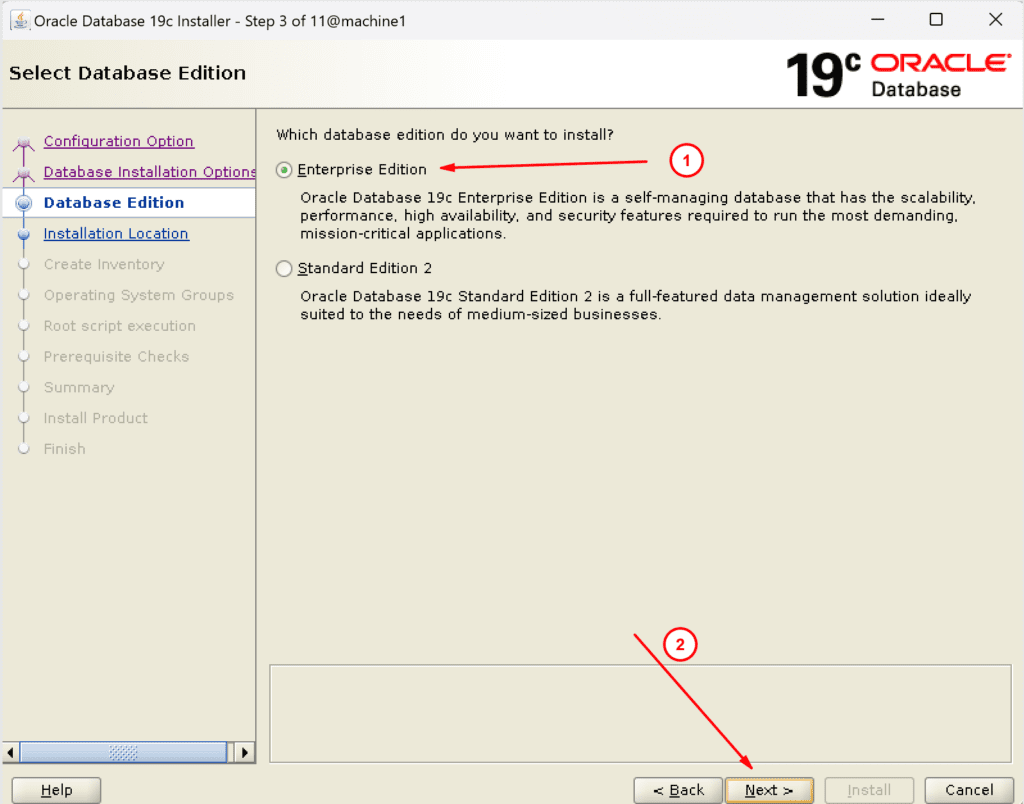
8. Select Enterprise Edition and click on Next:

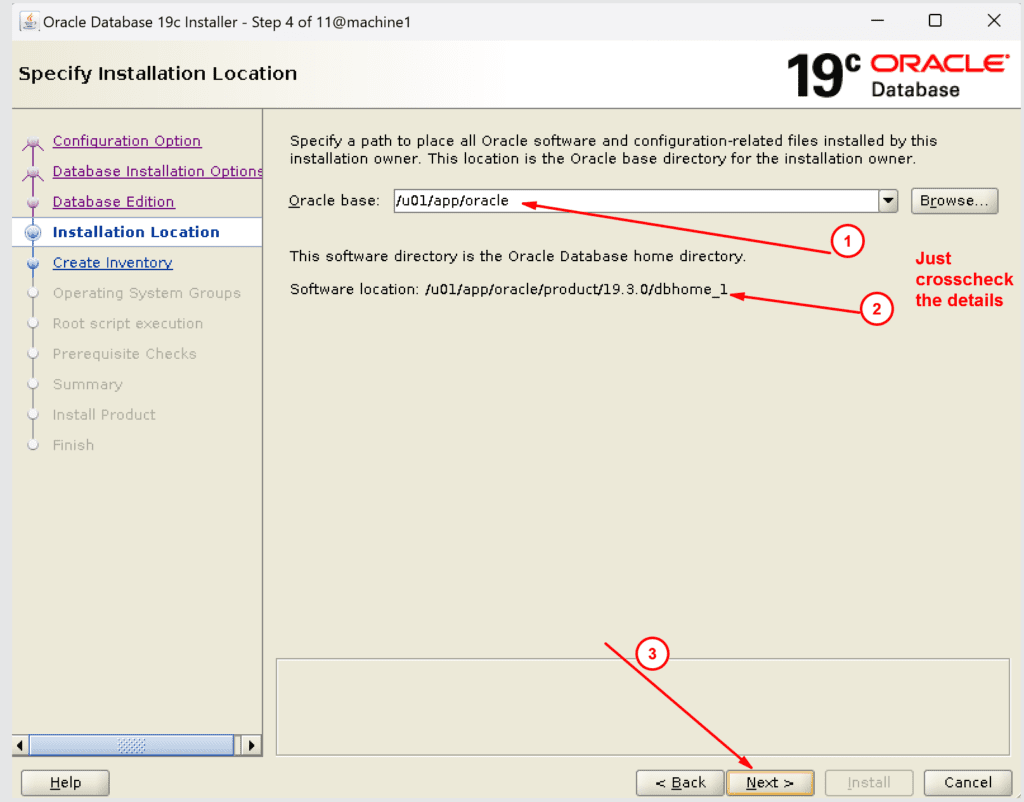
9. Crosscheck the Oracle base and oracle home location and click on next:

10. Crosscheck the oracle inventory and click on next:
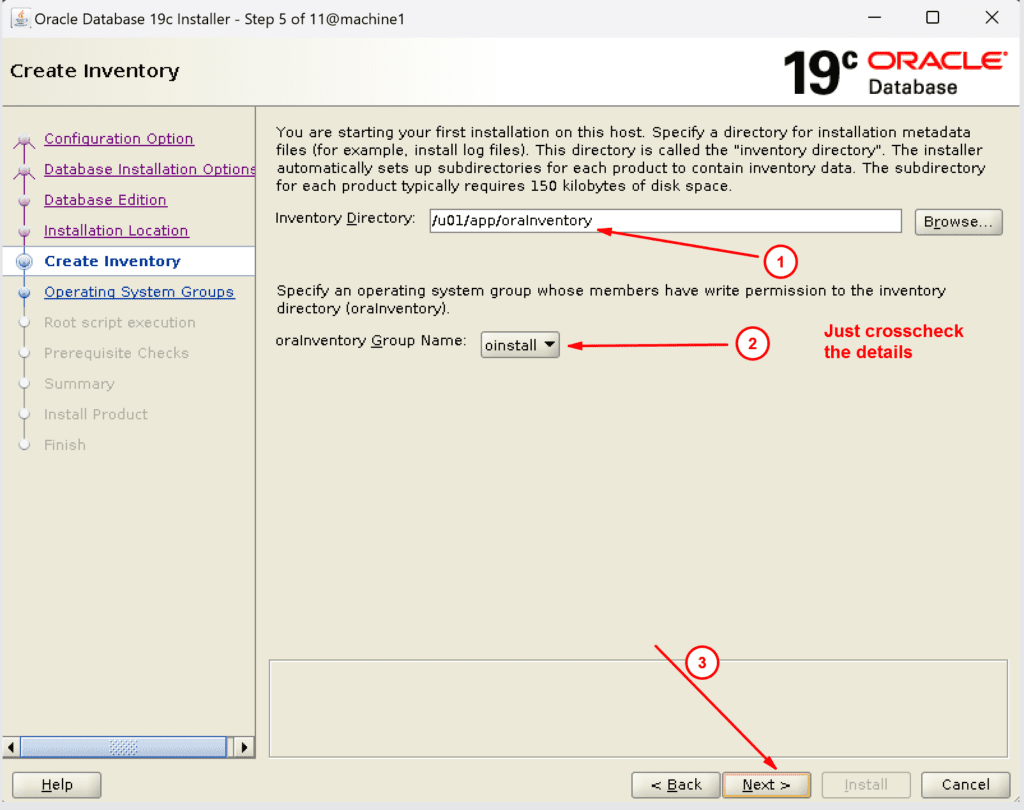

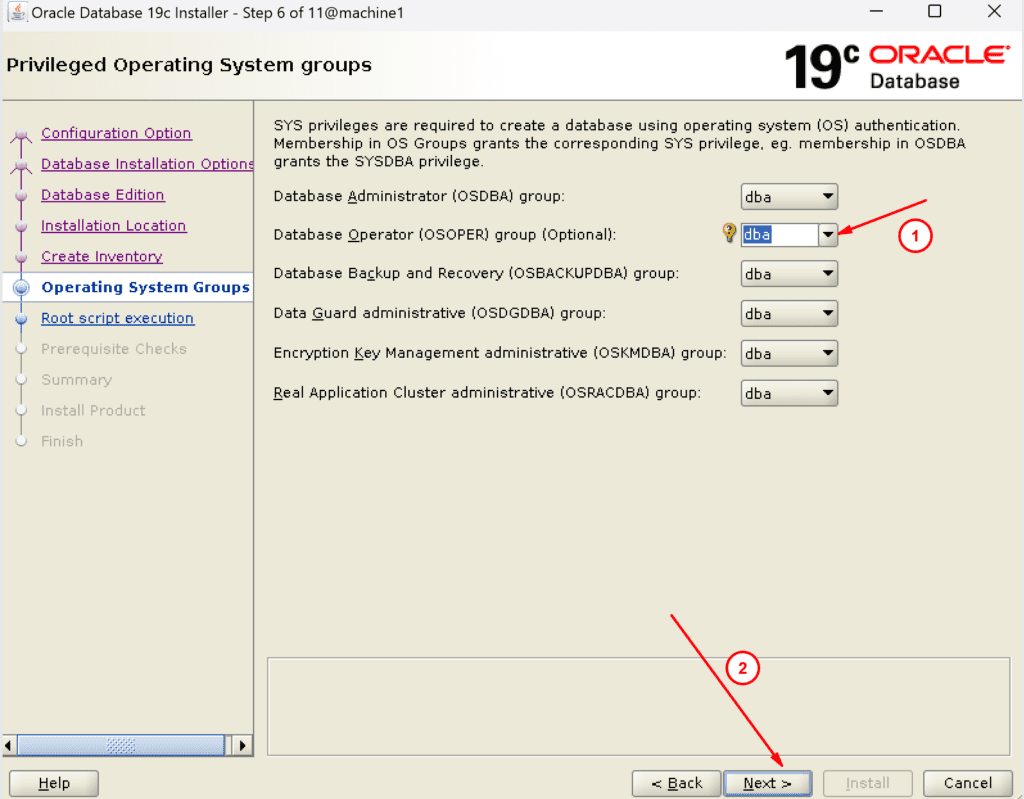
11. Choose OSOPER group to dba and click on next:

12. Use the root password and click on Next:

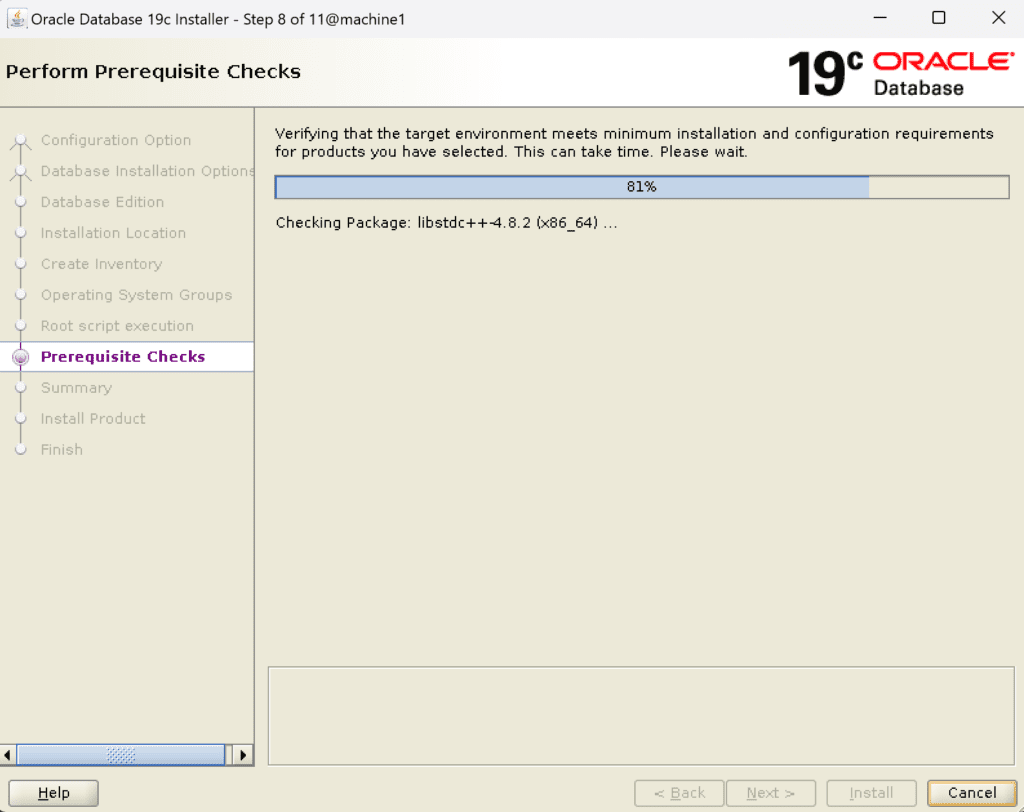
13. Wait until prerequisite checks are done :

14. Now you have two options:(Choose any one)
a.Save the response file and cancel the installer to start the installer in silent mode using the created response file:
I have saved the response file in the /home/oracle location with the name db.rsp. Now run the below command to start the installer in silent mode.
$ORACLE_HOME/runInstaller -silent -responseFile /home/oracle/db.rsp
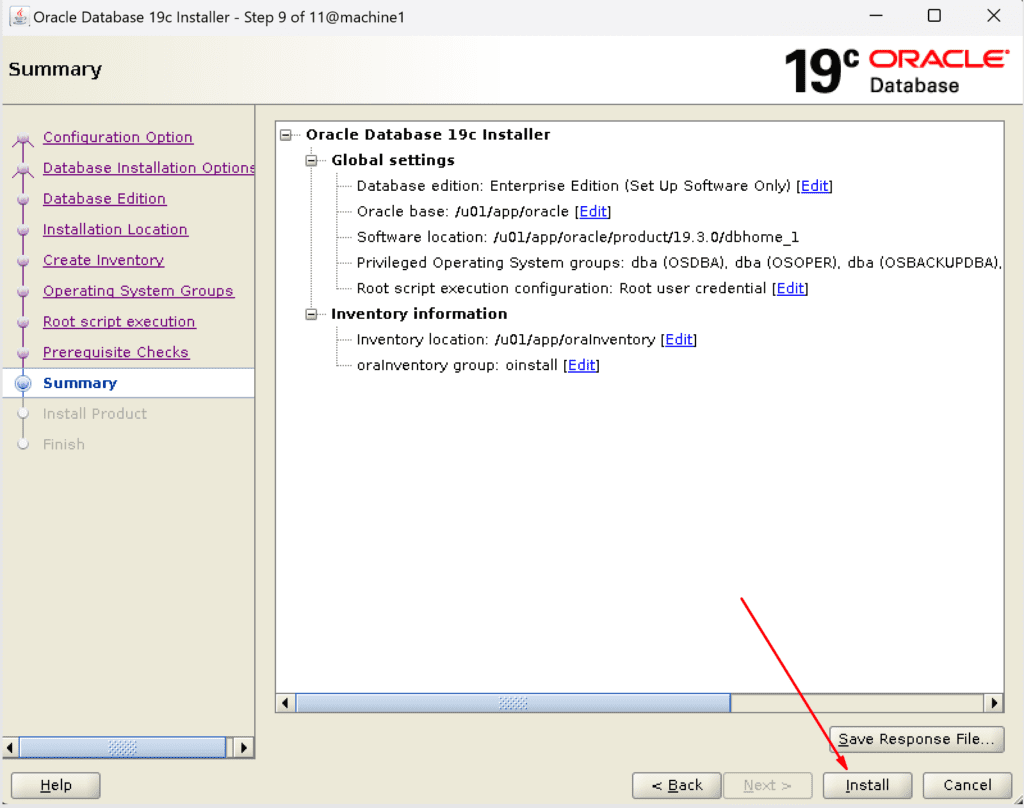
b.Click on Install to proceed:

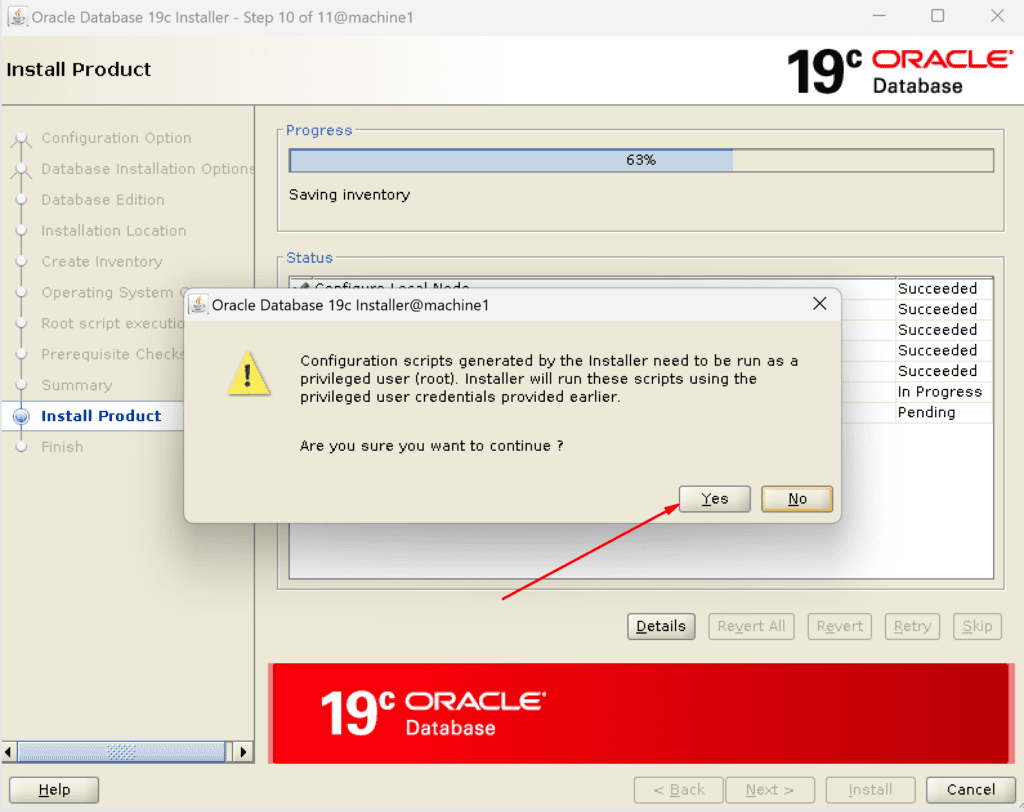
15. Ignore the warning and click on yes:

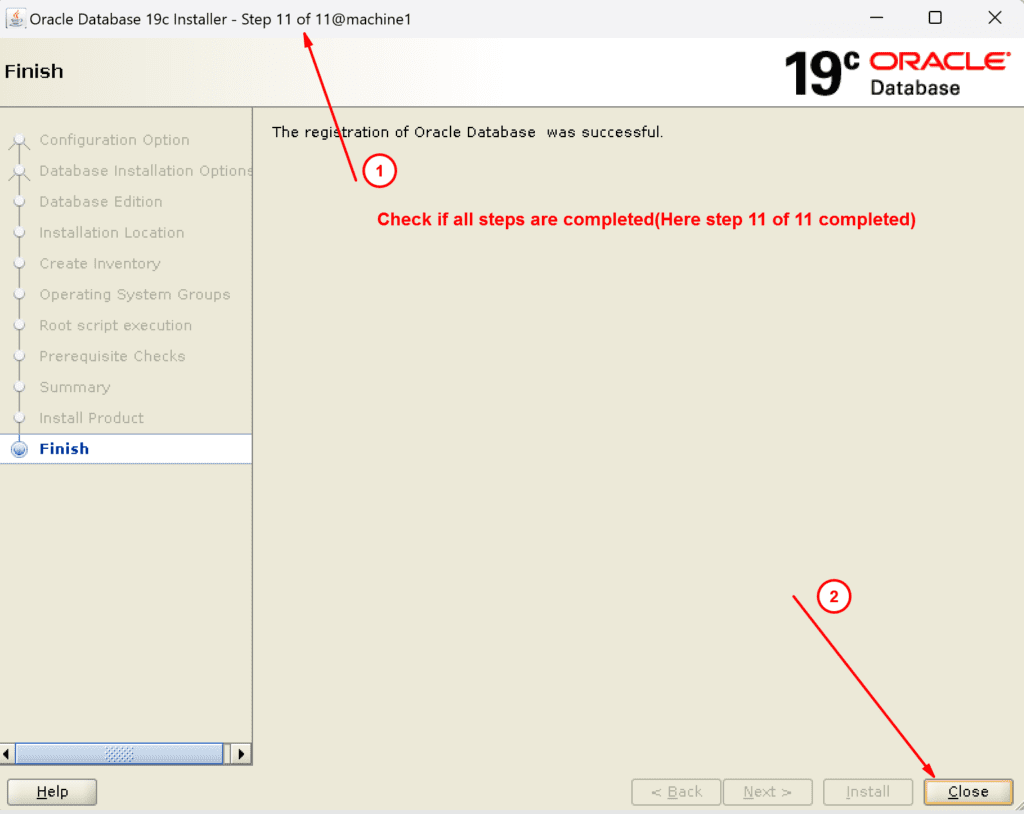
16. Congratulations! You have successfully installed oracle software on your machine. Click on close.

17. Verify if the Oracle 19c client was installed successfully:
a. verify if SQL*Plus is running from Oracle home:
which sqlplus

b.Check the inventory details:
cat /u01/app/oraInventory/ContentsXML/inventory.xml
If you need detailed information about Oracle 19c client, follow the referenced article Install Oracle 19c Software/Client.