In this article, I will provide a detailed guide on how to create shared disk in VirtualBox for ASM. We’ll walk you through each step of the process with proper screenshots.
In this practice, I assume that you have already created the two RAC nodes and want to create shared disks for Oracle RAC clusters in Virtualbox.
Table of Contents
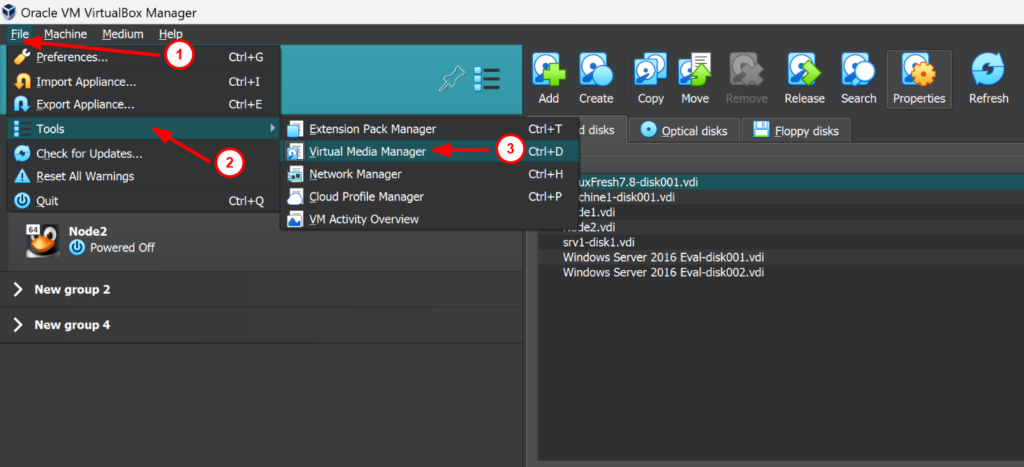
1.Click on File and then select Tools option. Under Tools, you have to select Virtual Media Manager.
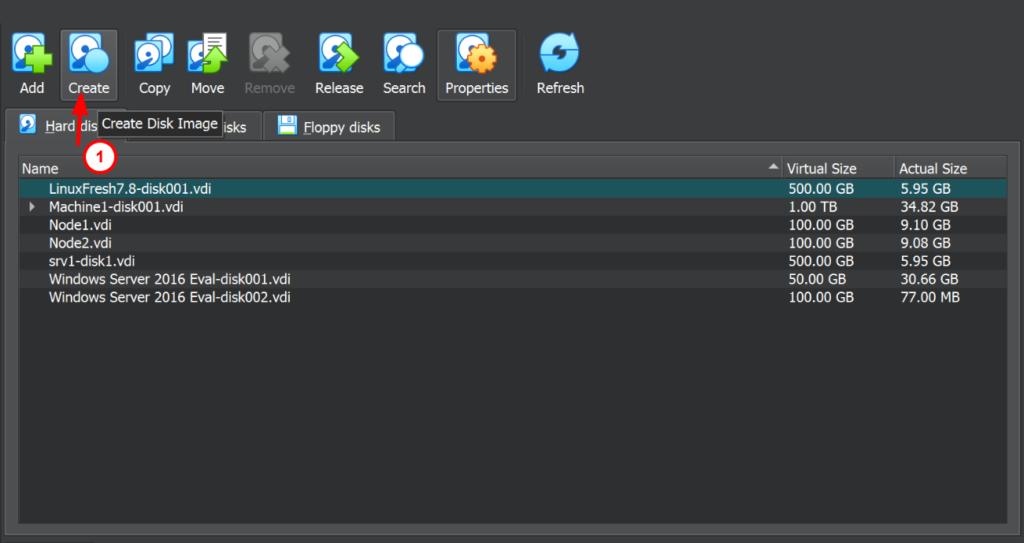
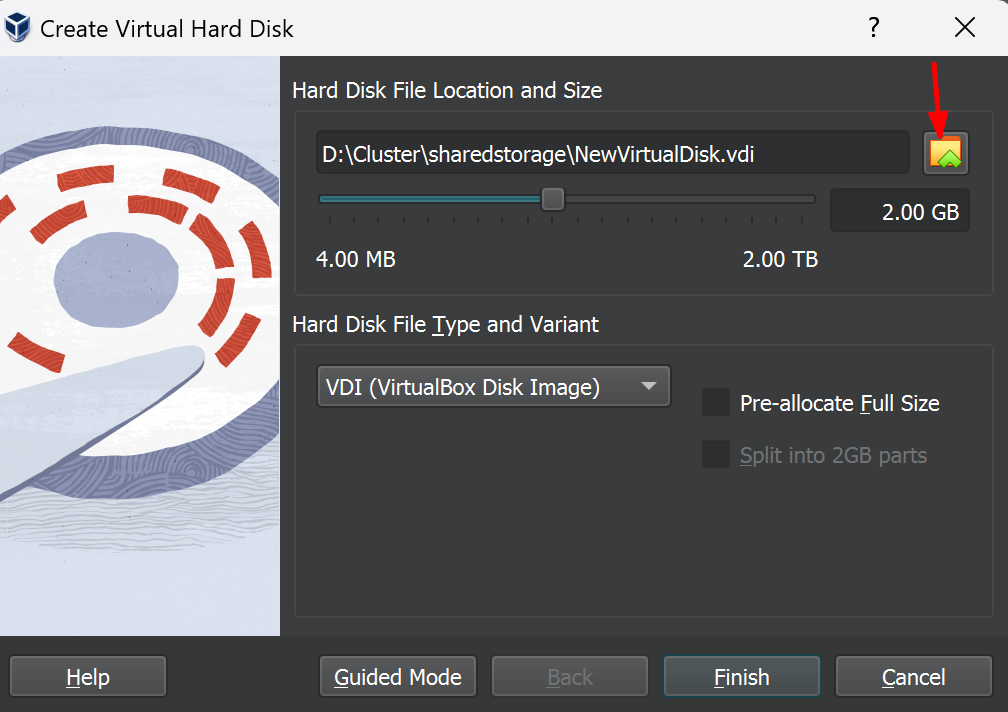
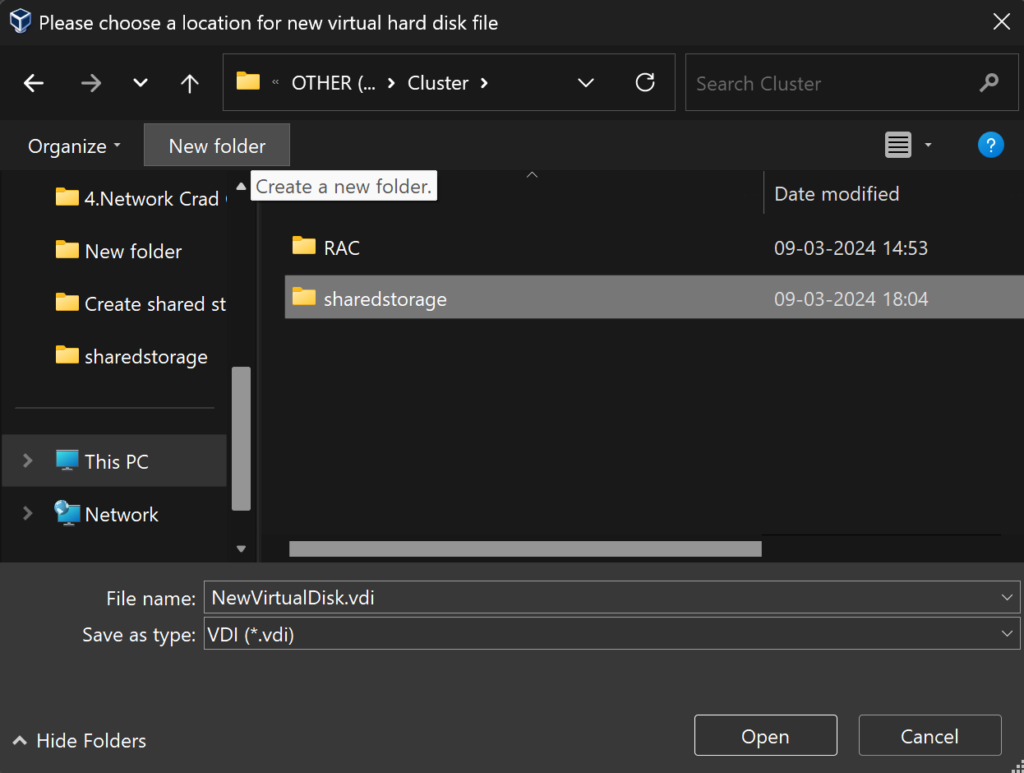
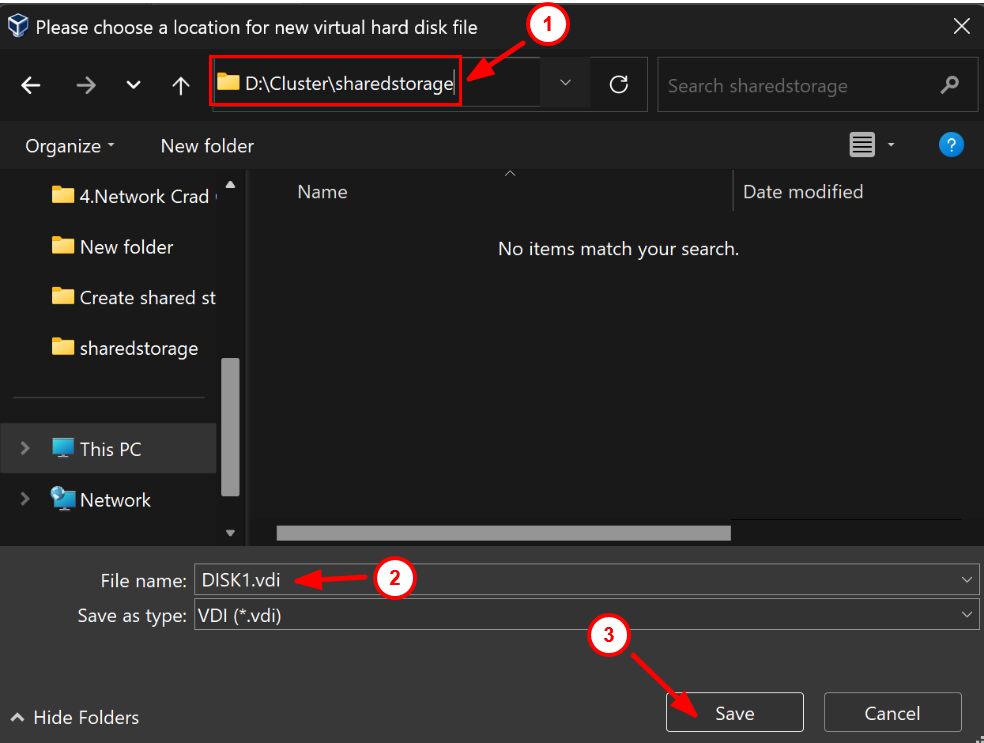
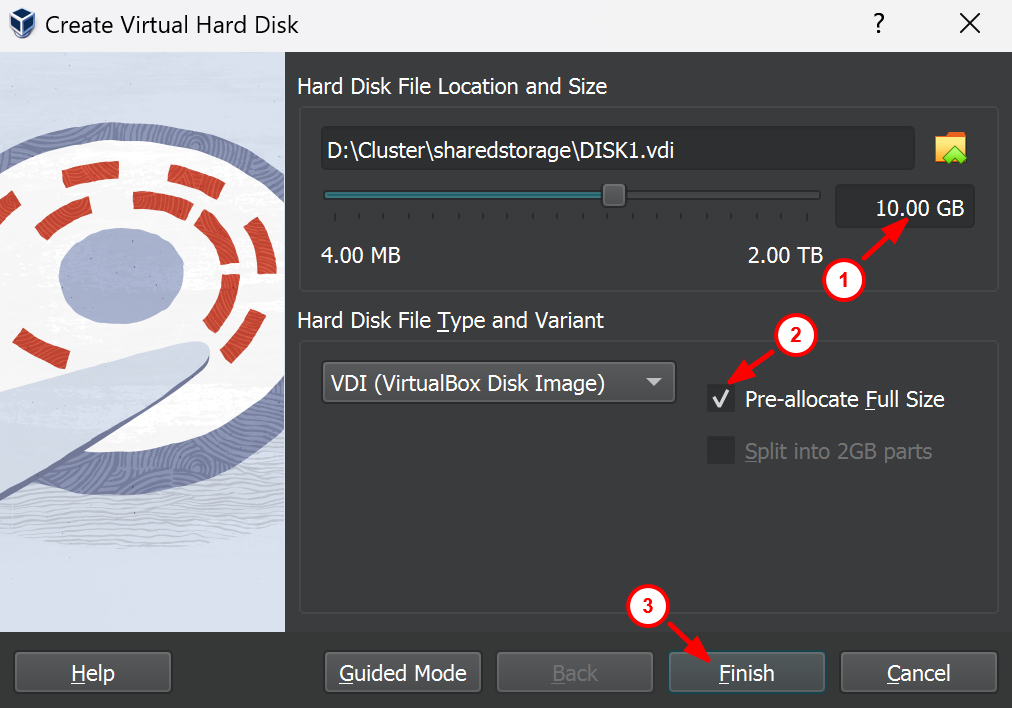
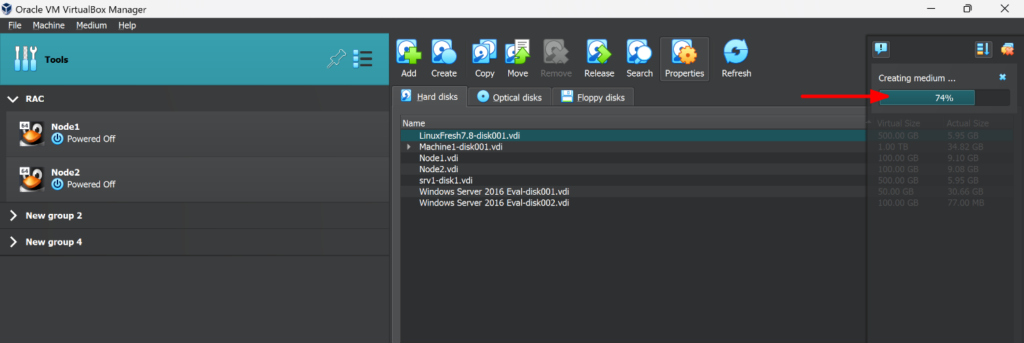
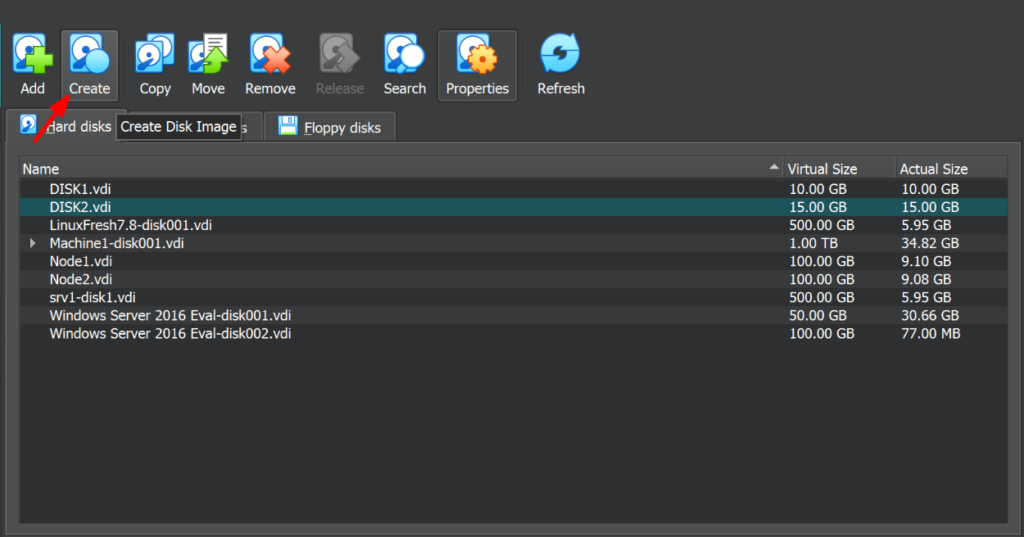
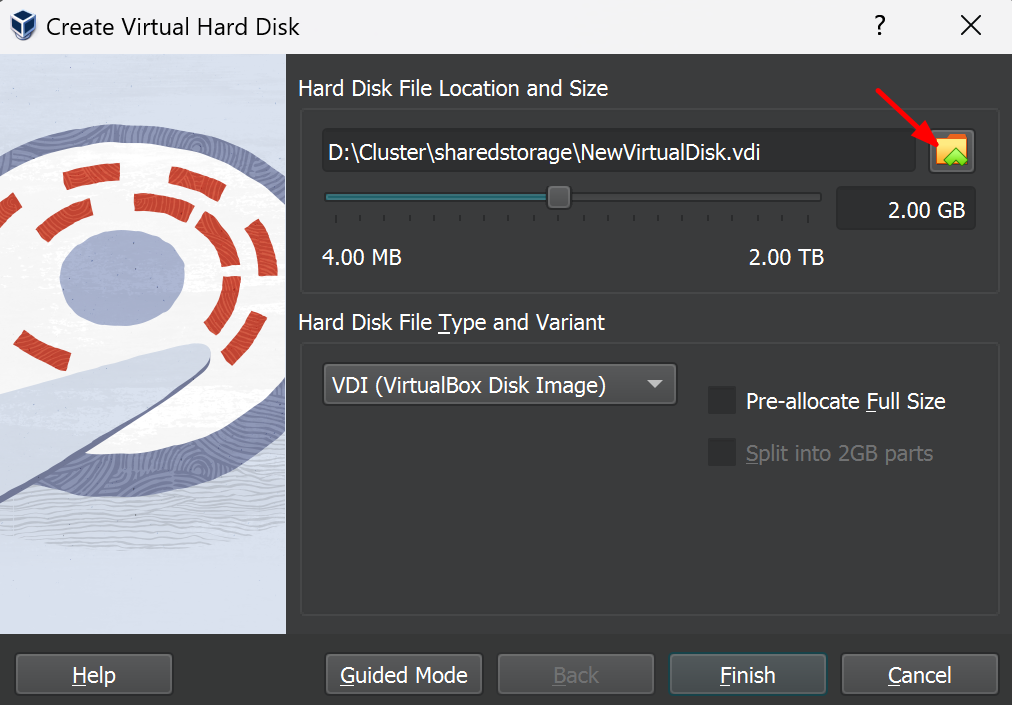
2. Now you have to create a disk image. Click on the Create button and select hard disk file location and size. Here we have created a disk image called DISK1.vdi with a 10GB size.
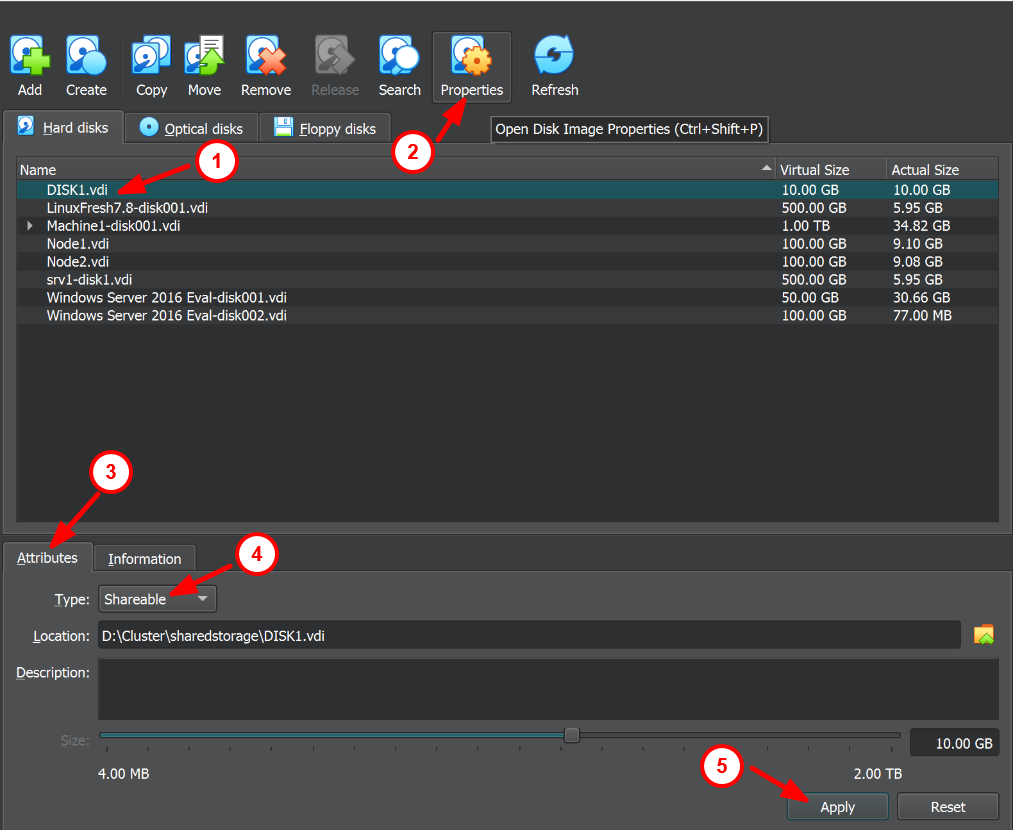
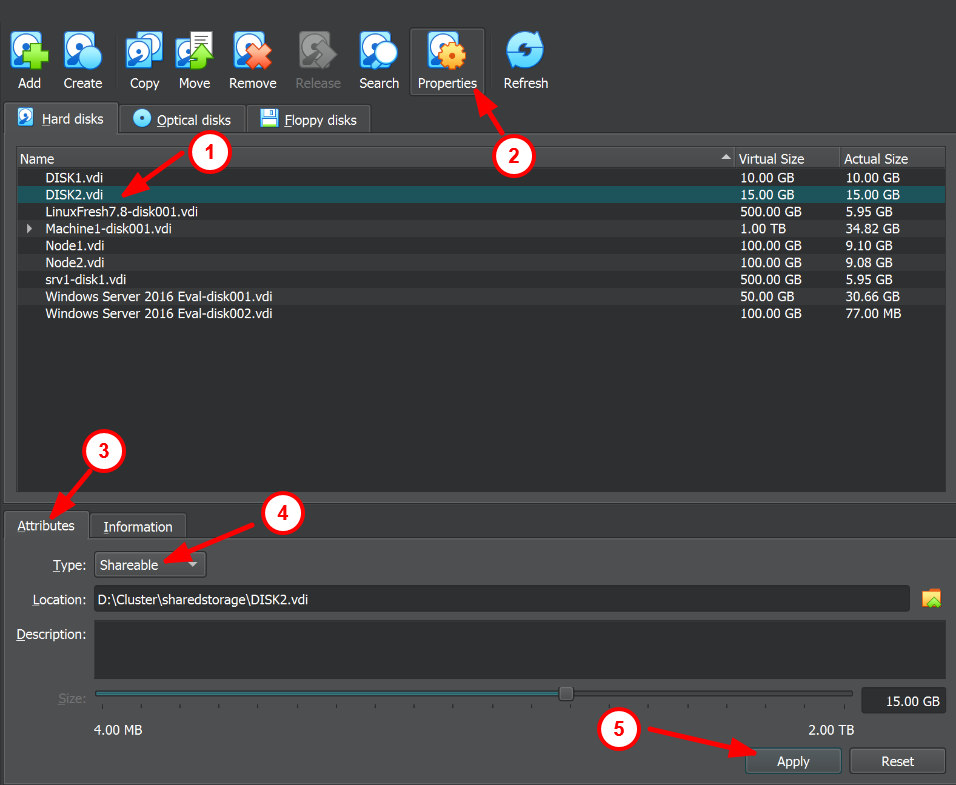
3. Select DISK1.vdi and click on properties to change the attribute type to shareable so that both nodes node1 and node2 can share this disk.
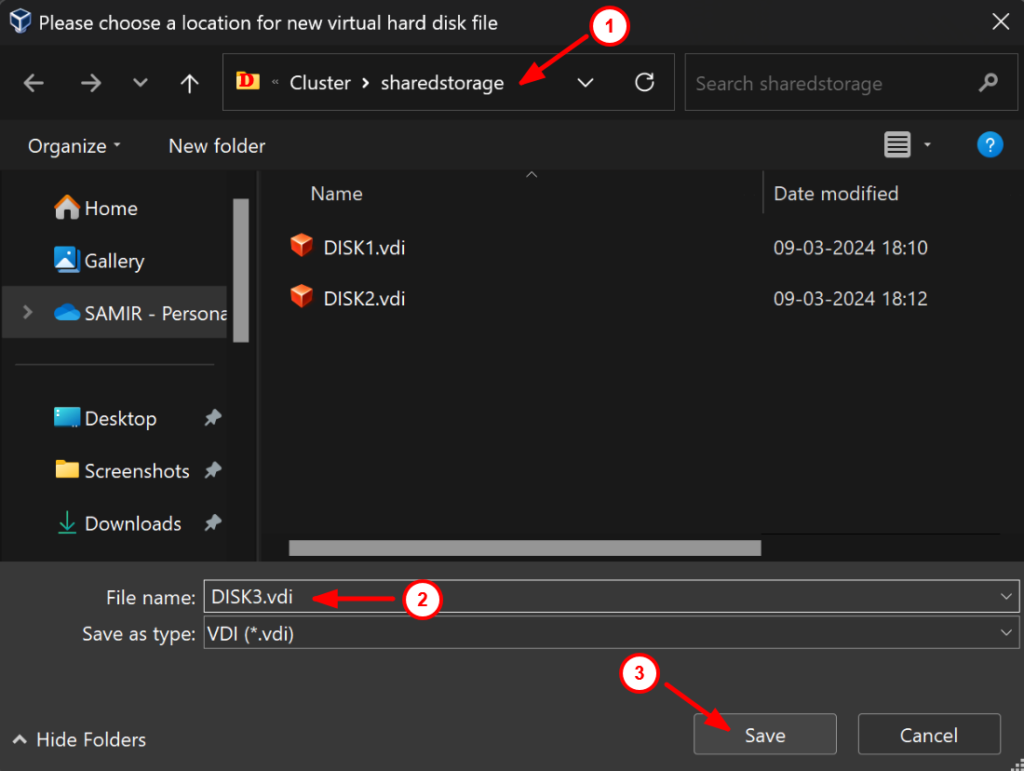
4. Now we have to create another disk image DISK2.vdi with a 15GB size. You can create with different size as per your requirements.
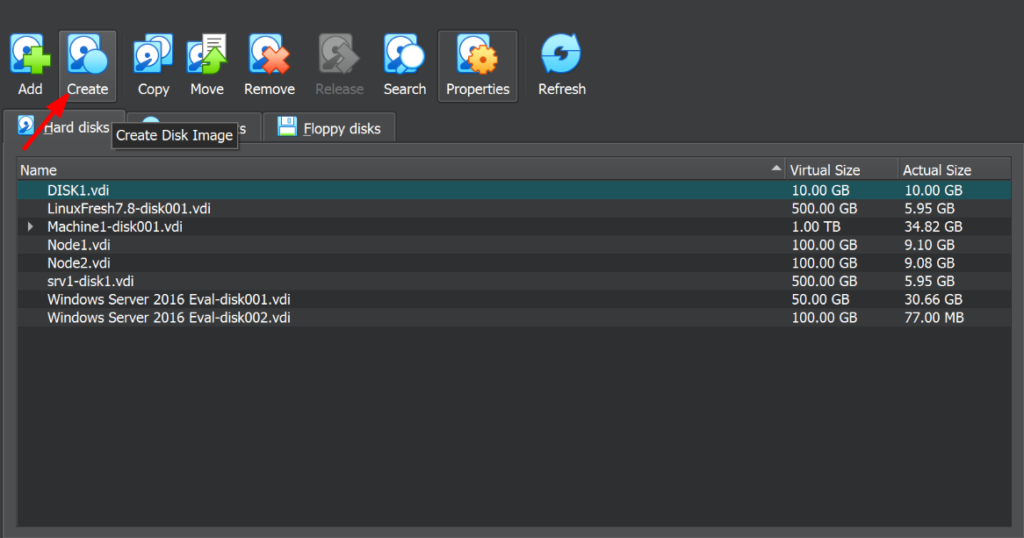
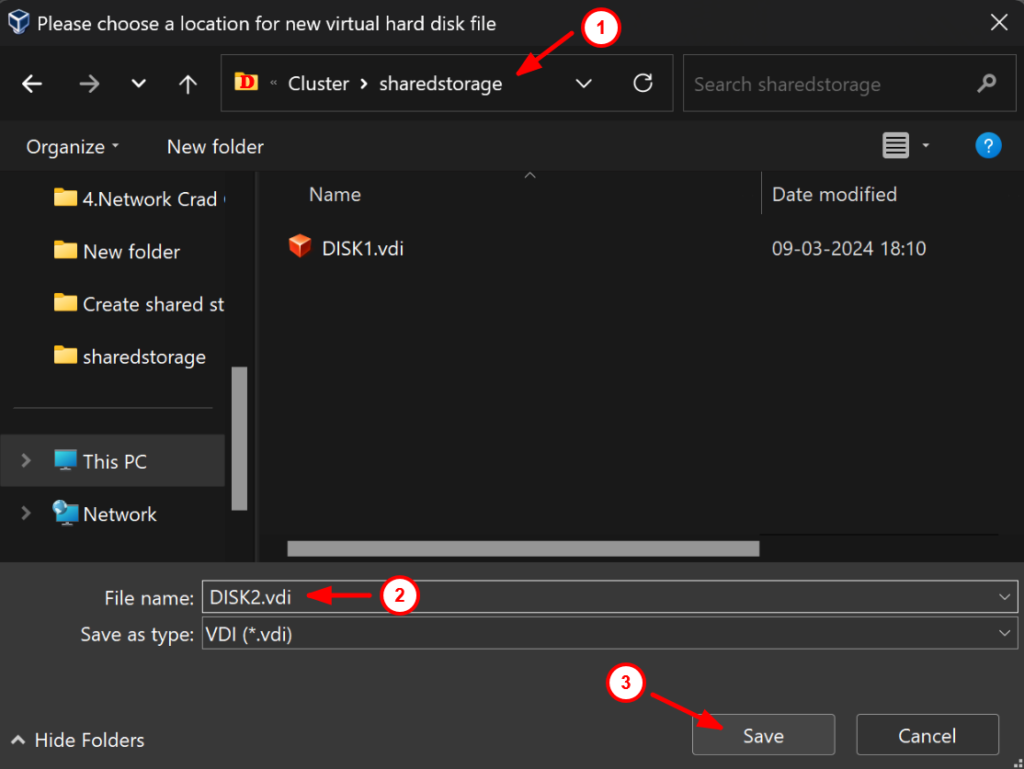
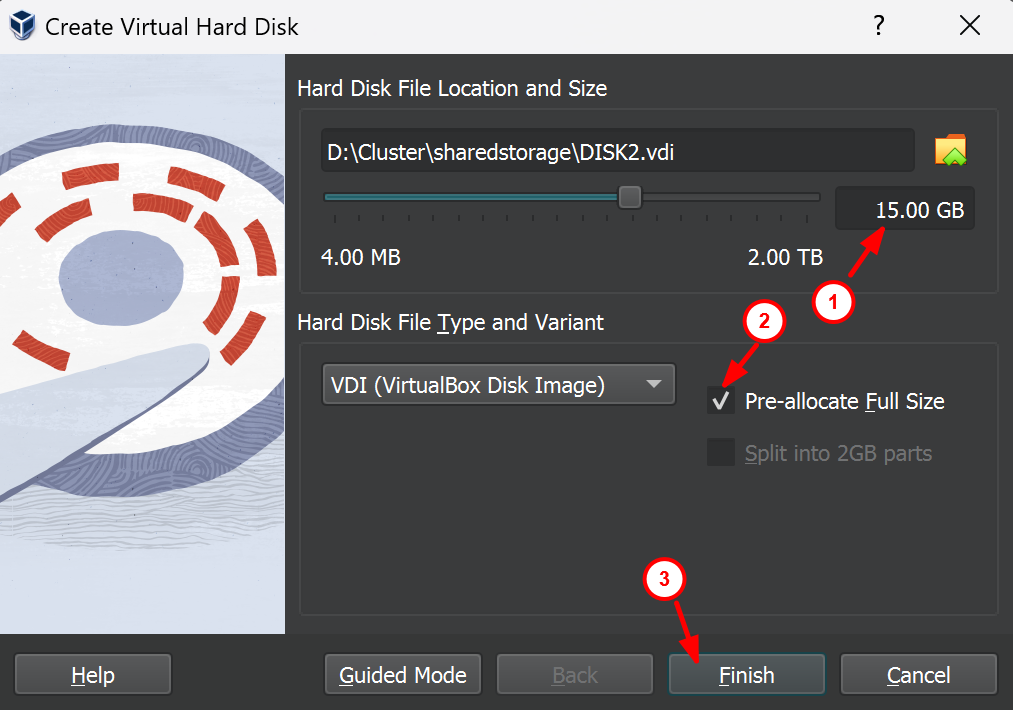
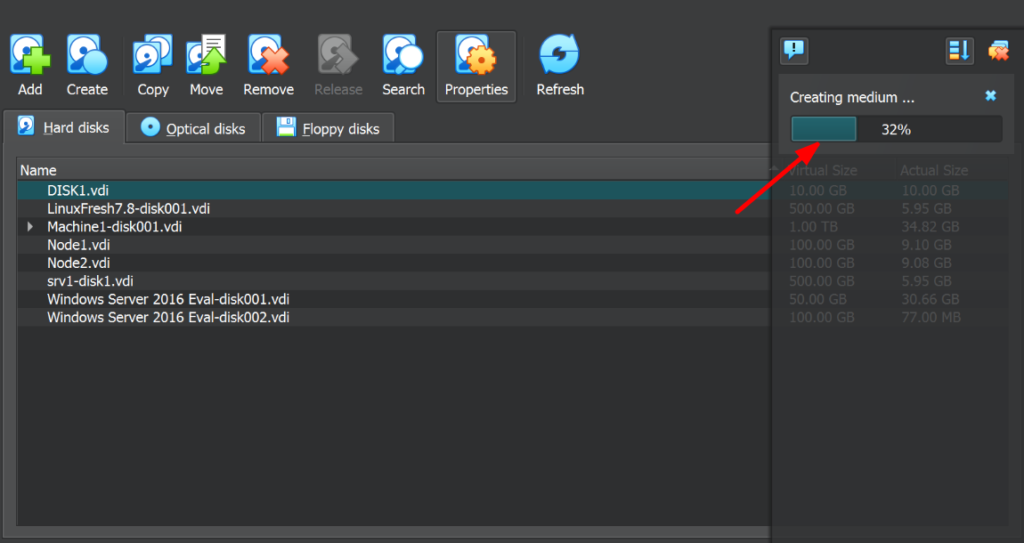
5. Make the DISK2.vdi disk image shareable.
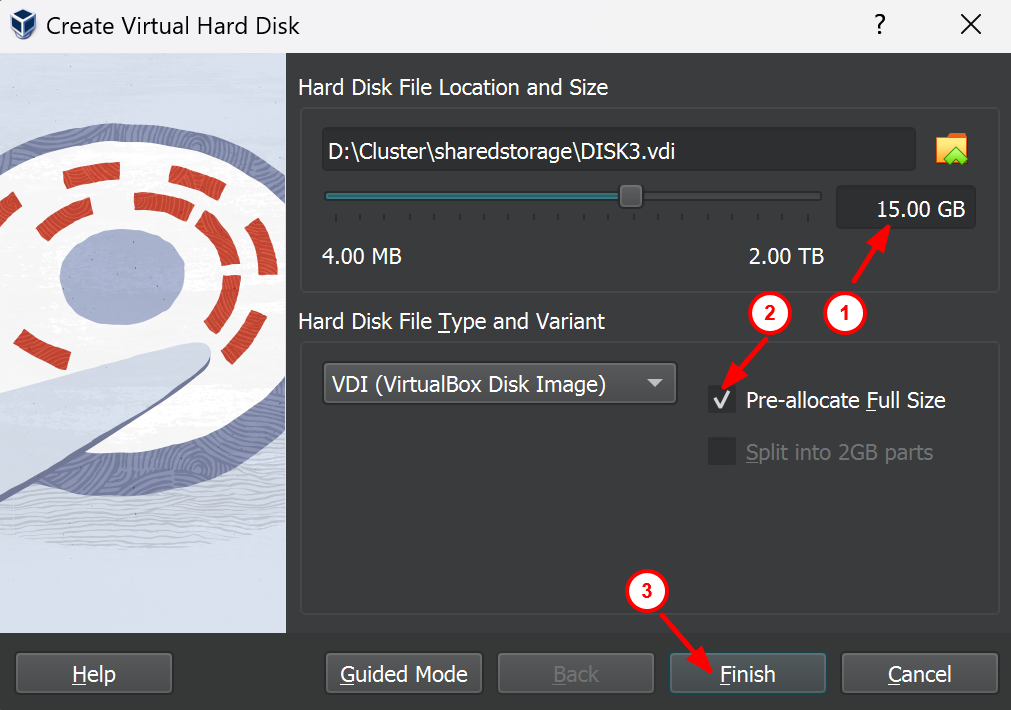
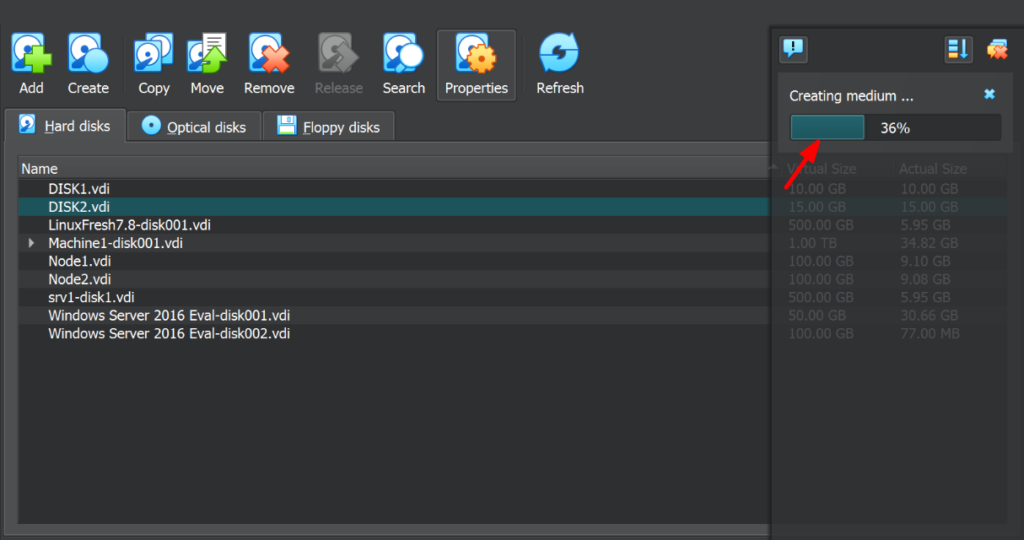
6. Create the third disk image DISK3.vdi with a 15GB size.
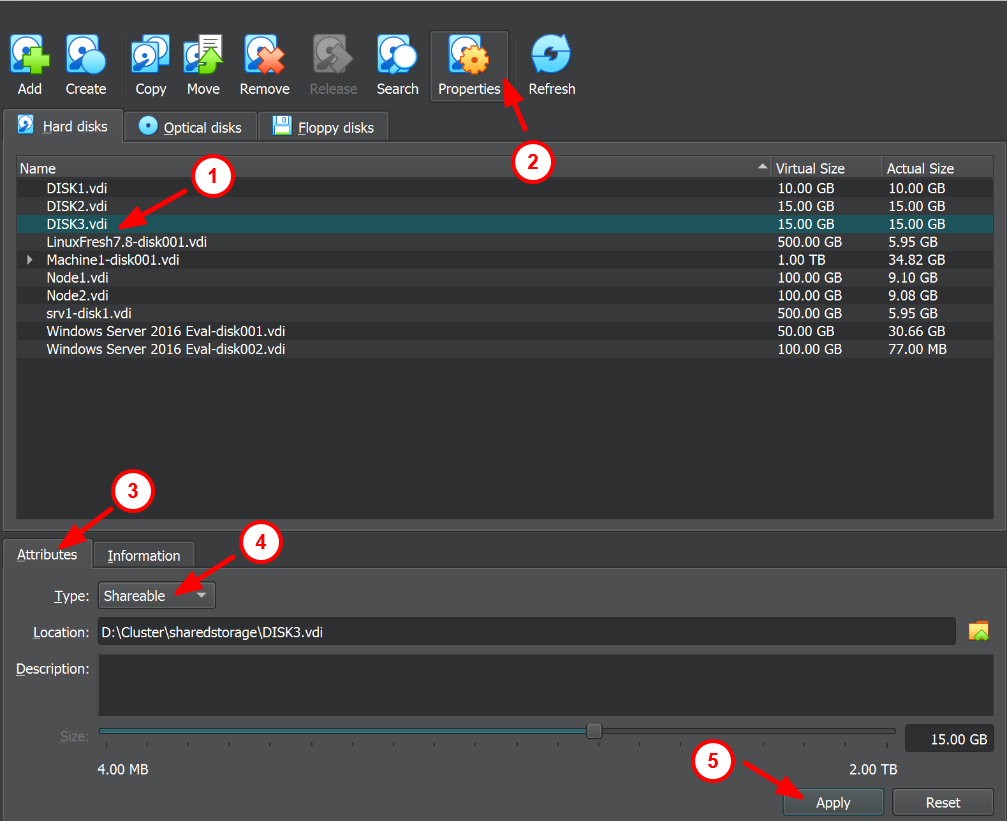
7. Make the DISK3.vdi disk image shareable.
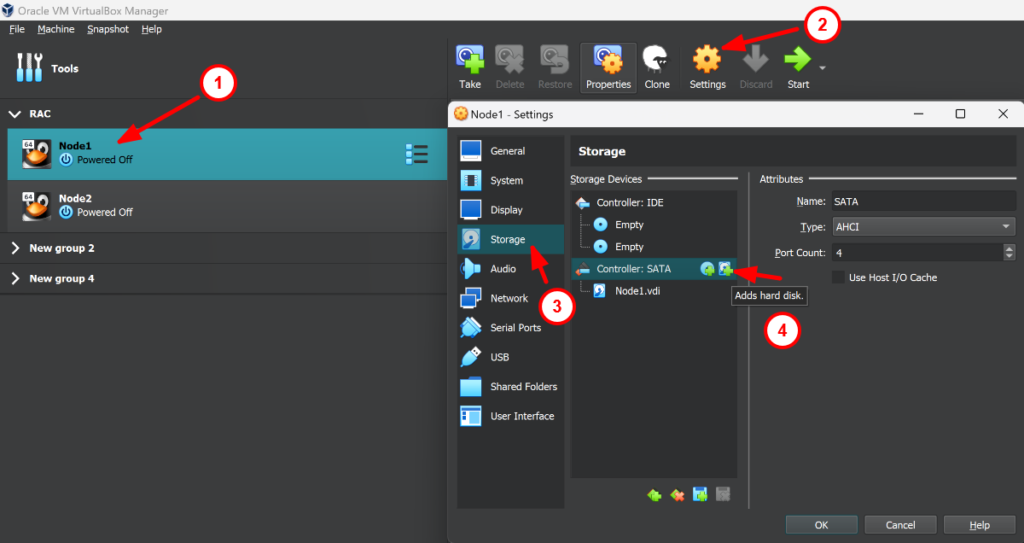
8. Till now we have created three disk images with 10GB,15GB, and 15GB size. Now select node1 and click on settings. Under the storage section, select controller and adds hard disk by selecting DISK1.vdi disk image.
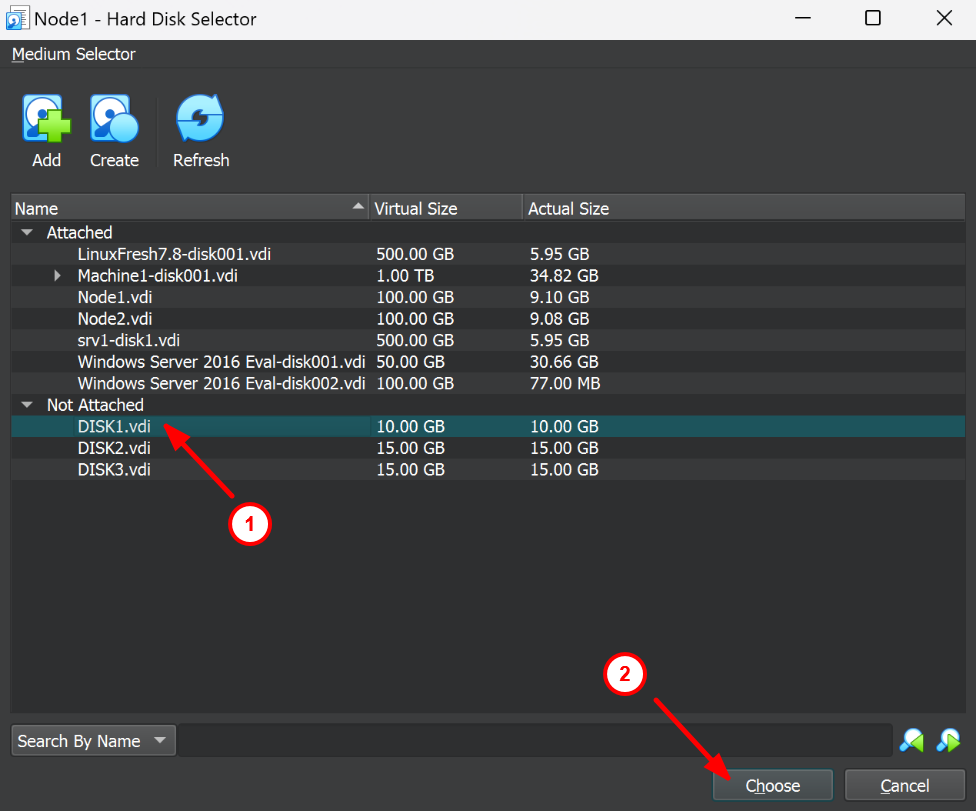
9. Now add another hard disk and select the DISK2.vdi disk image.
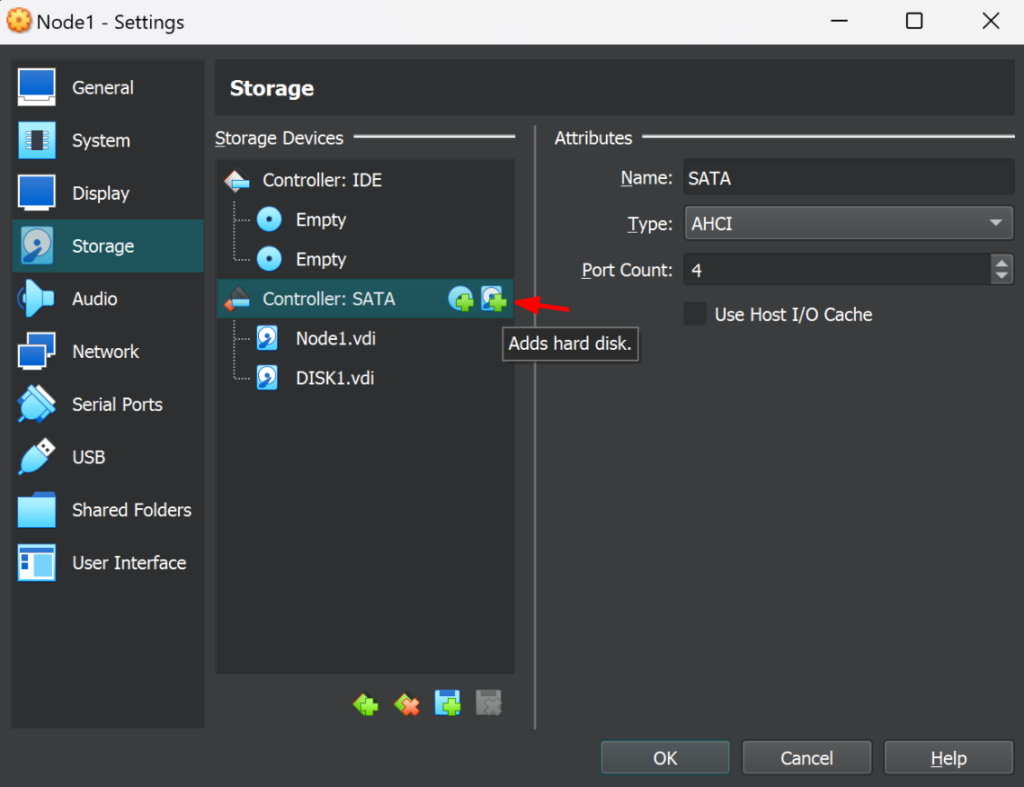
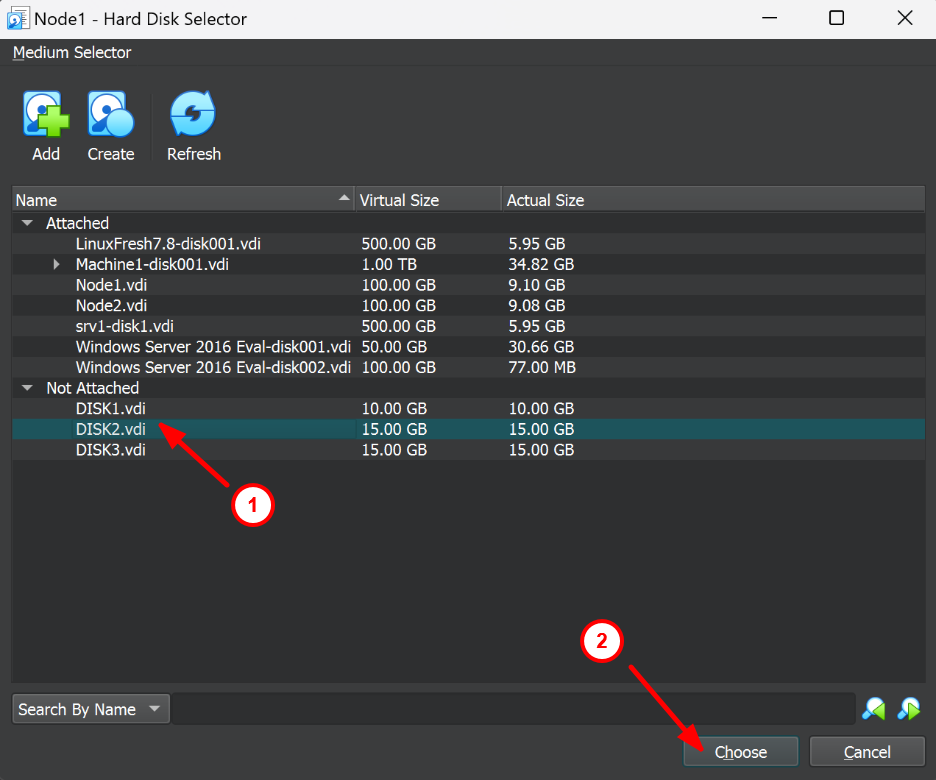
10. Add the third hard disk and select DISK3.vdi disk image.
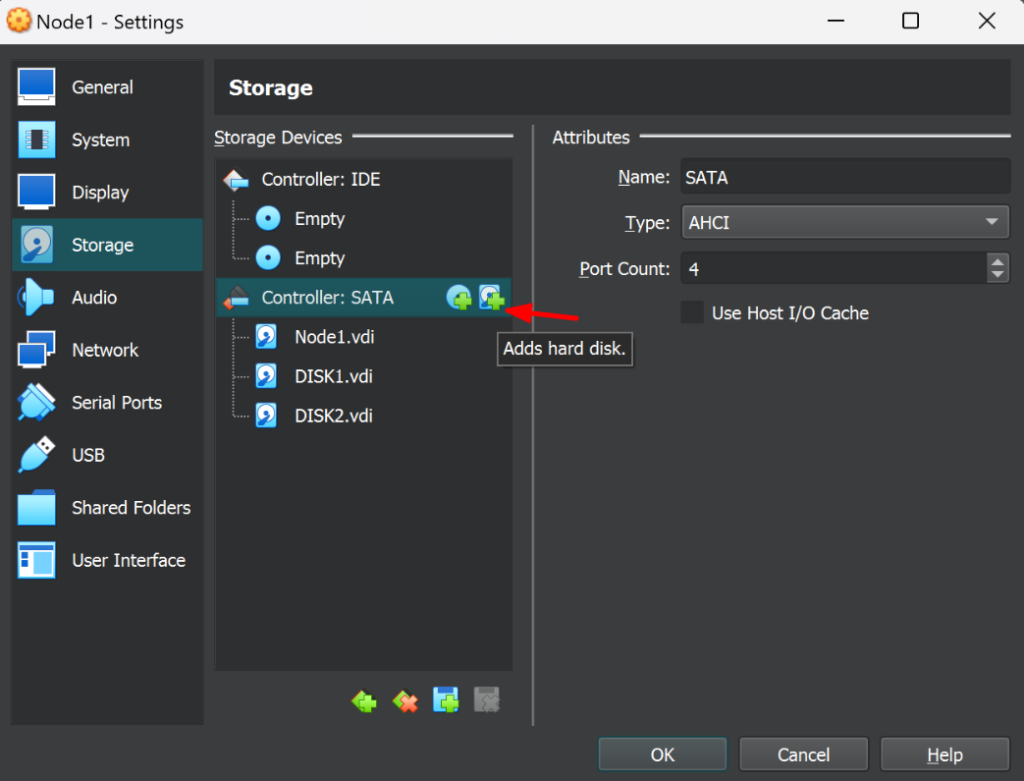
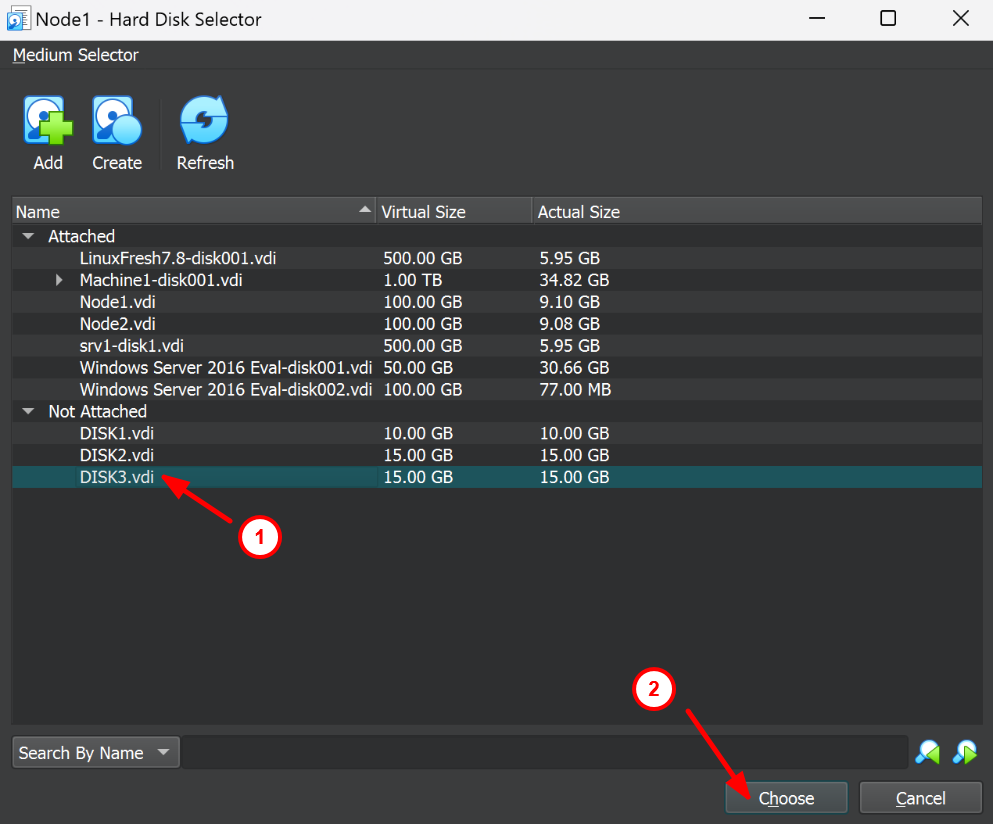
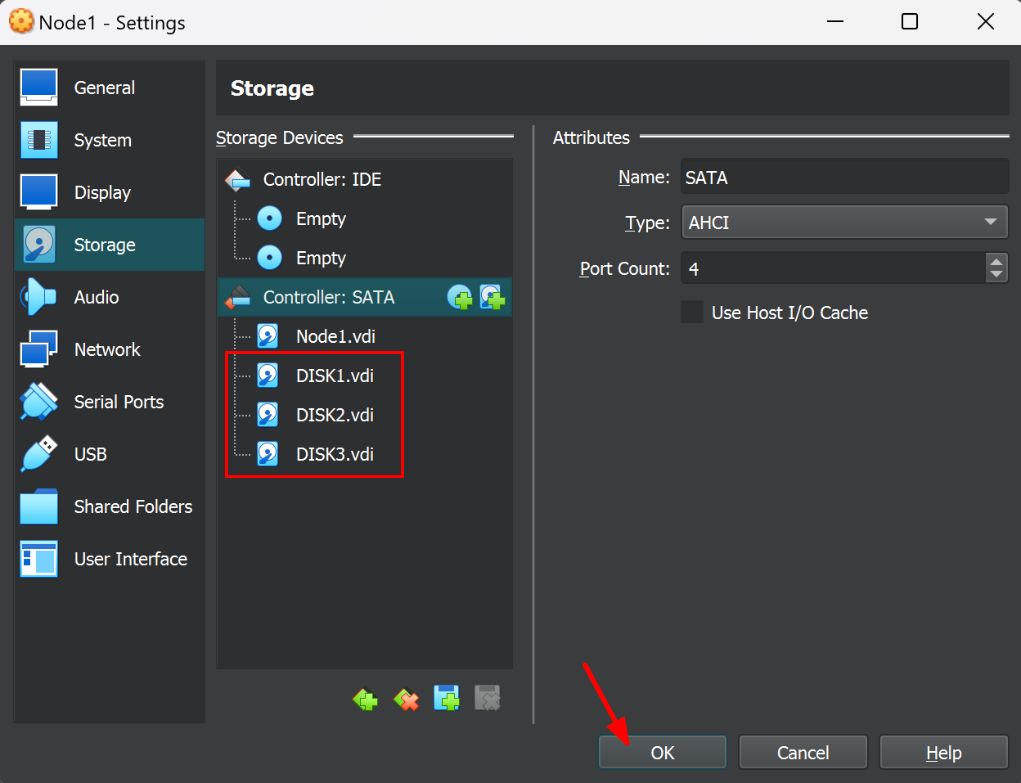
11. Here we can see we have added three hard disk images DISK1.vdi, DISK2.vdi and DISK3.vdi.
12. Now select node2 and click on the settings option. Under settings, select the controller and add hard disk DISK1.
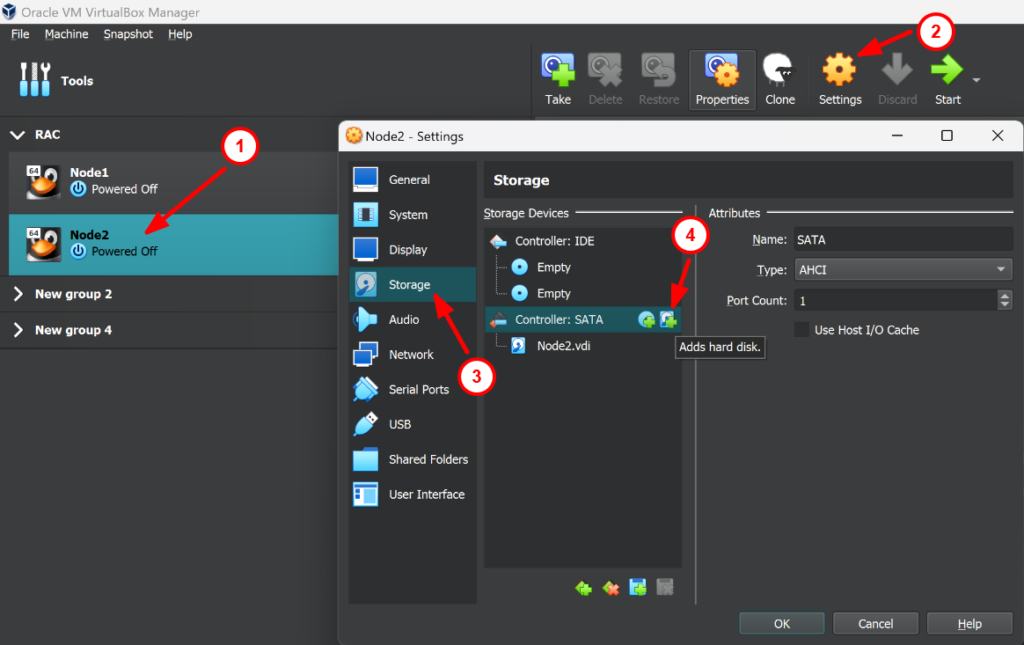
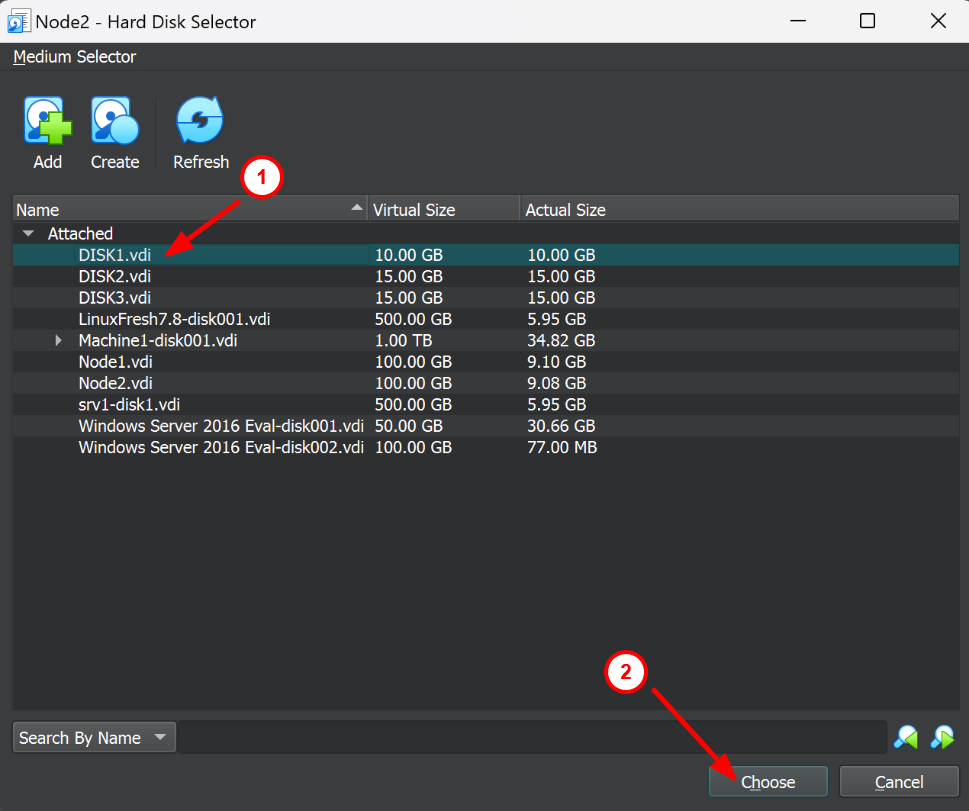
13. Click on adds hard disk and choose DISK2.vdi
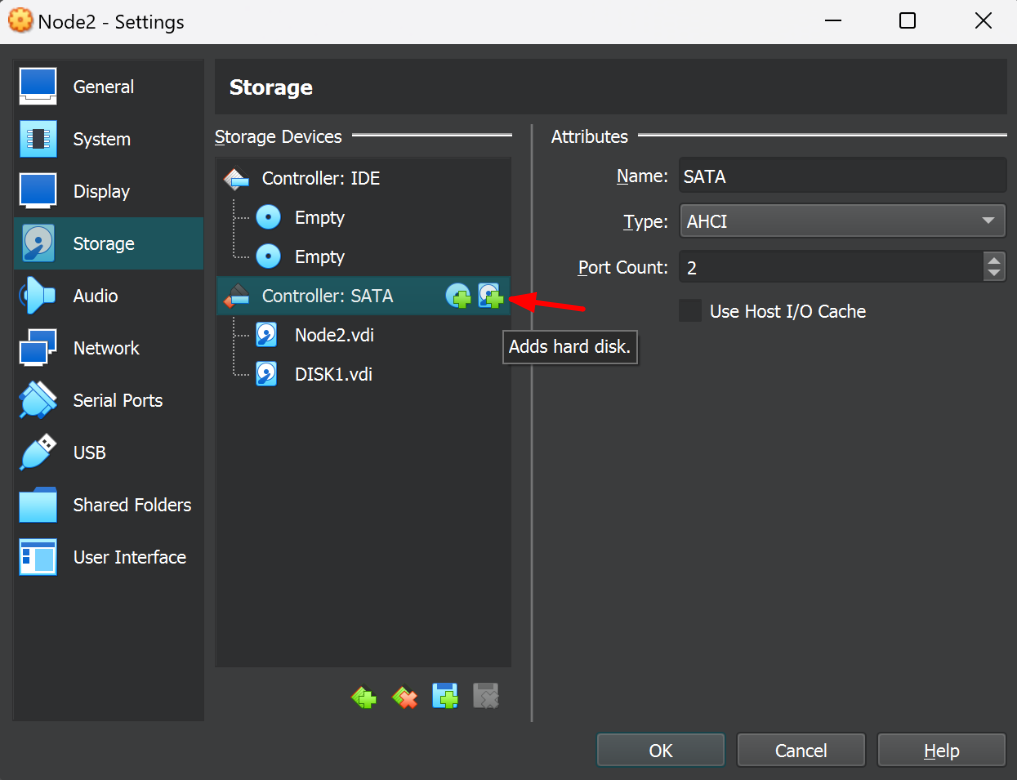
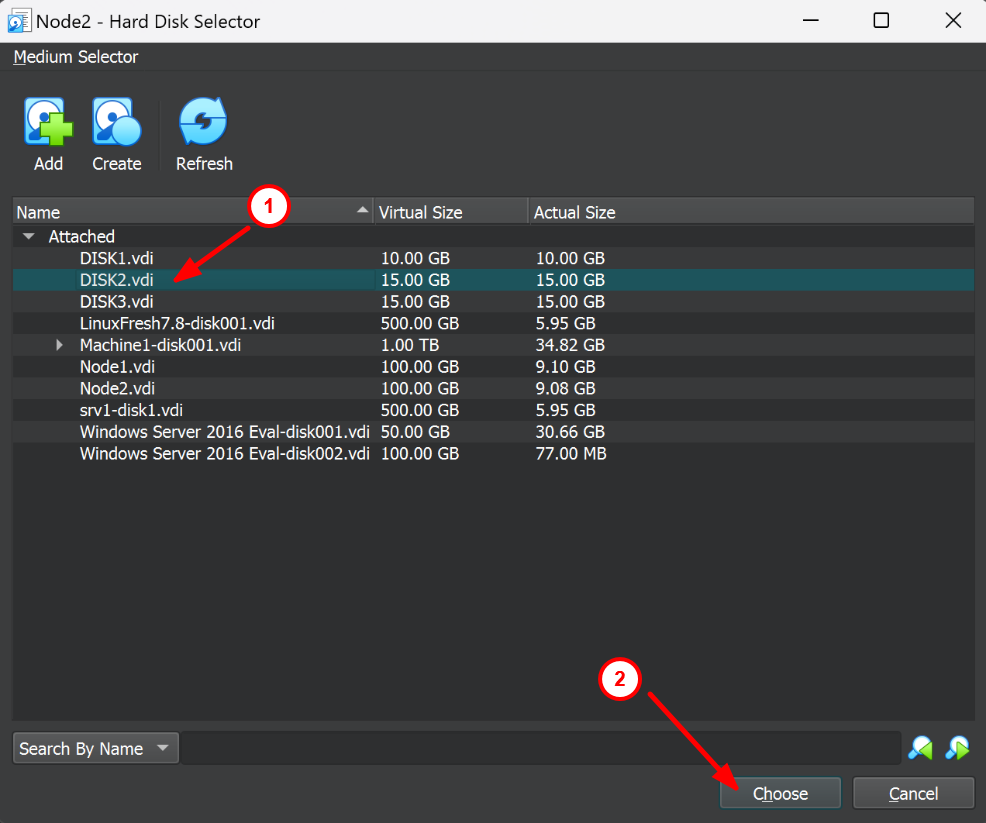
14. Click on adds hard disk and choose third hard disk DISK3.vdi
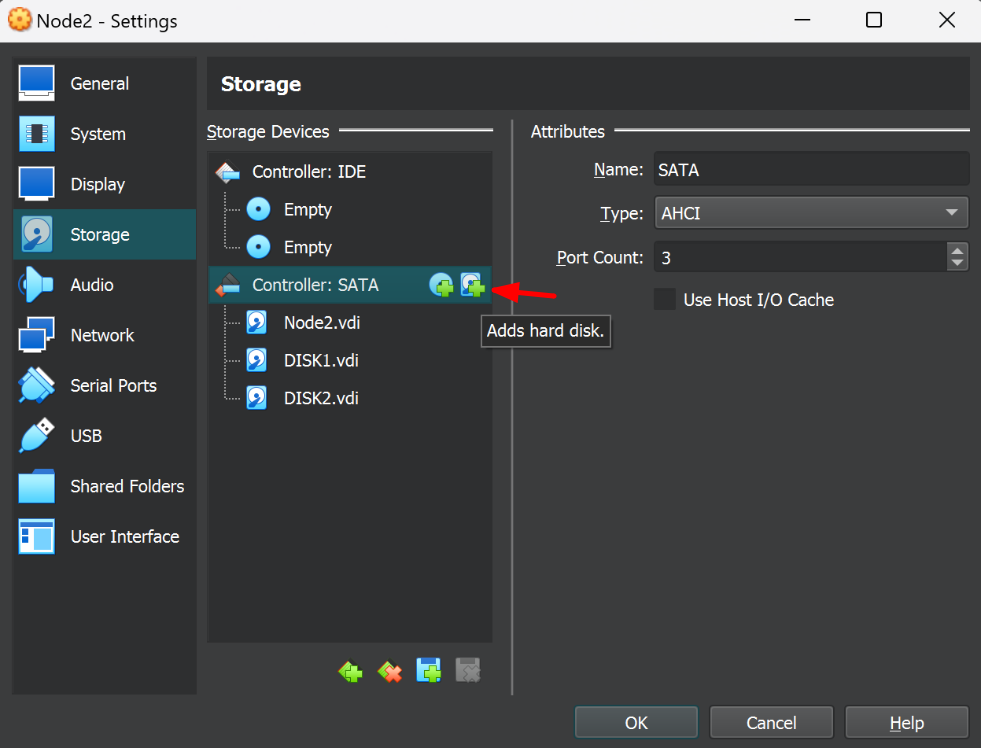
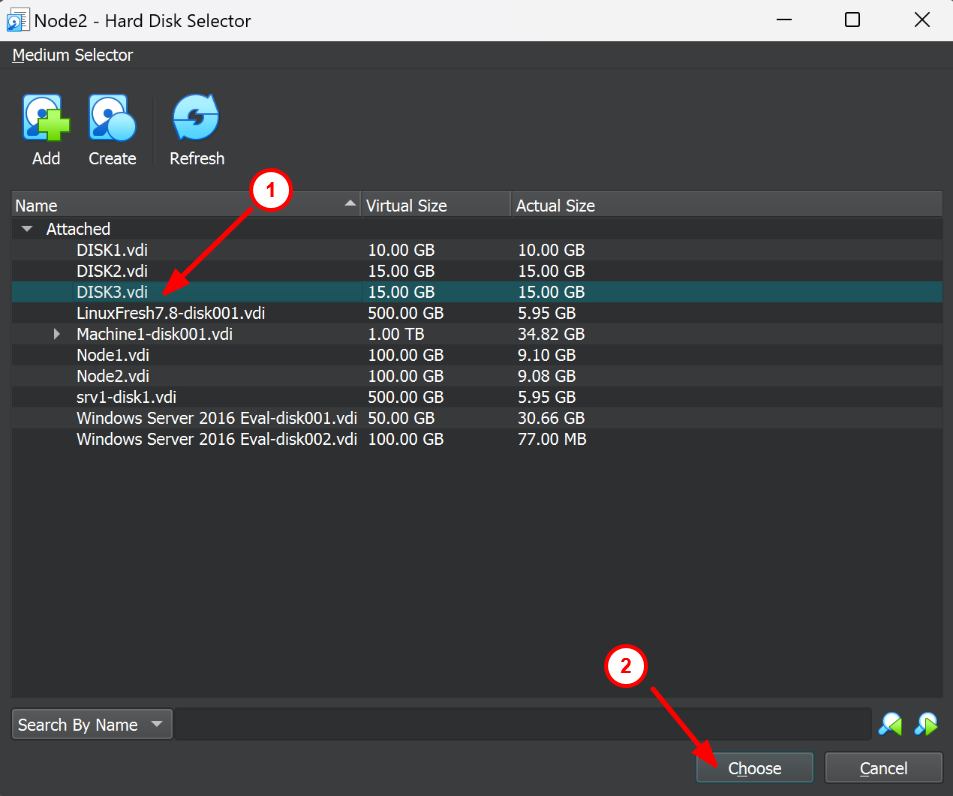
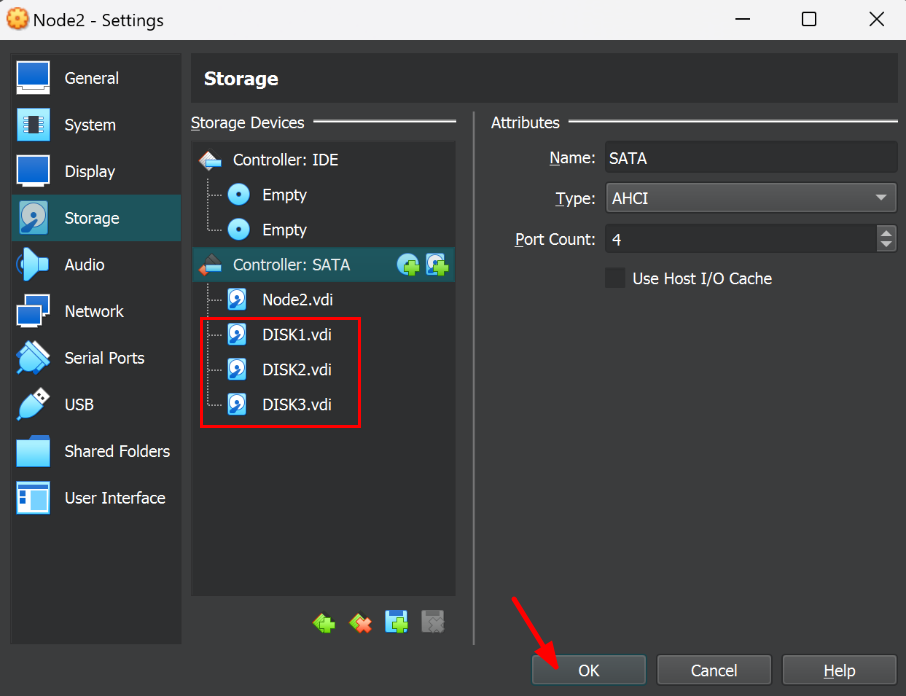
15. Congratulations! You have successfully added the three shareable hard disks DISK1, DISK2, and DISK3 on both nodes.
Hope this step-by-step guide helped you to create shared disk in VirtualBox. If you want to create disk partition then you can follow my other article Disk partition creation in Linux.